Unboxing and Setting Up Your Auger Torque Drive Unit: A Comprehensive Guide
We’re going to walk you through the contents of your Auger Torque drive unit package and how to set it up. This applies throughout the range of S4 drive units, from the X1500 through to the 4500MAX.
Unboxing Your Drive Unit
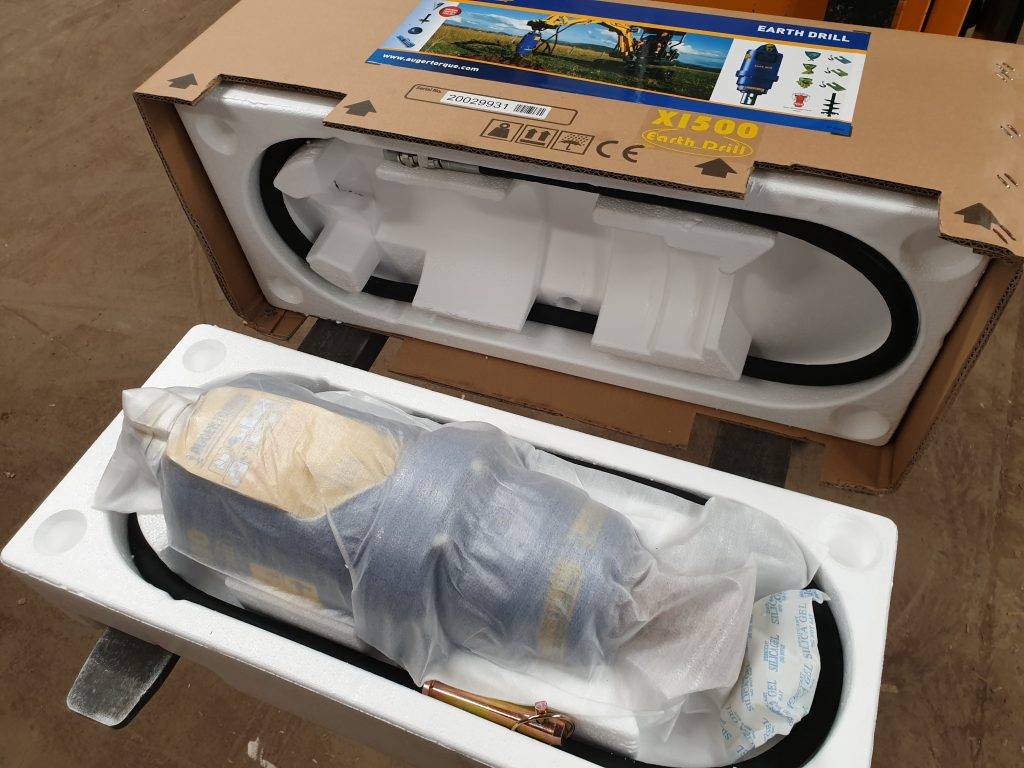
When your drive unit arrives, it will come in a box whether it’s a standalone drive unit or part of a package. Inside the box, you’ll find the main drive unit, an auger retaining pin and clip, and two hydraulic hoses. One hose is located at the bottom of the box, and the other is tucked away in the lid of the box.
Upon unpacking, you’ll notice that the drive unit comes with a warranty card that contains vital running-in details and instructions on how to register your warranty. You can either send the card back to us or register online via the provided URL.
Setting Up Your Drive Unit
As you prepare to set up your drive unit, you will find two hydraulic hose ports in the motor with blanking caps on them. For the S4 range, they are 1/2″ BSP. The first step is to remove both blanking caps, ensuring to take off the rubber seals to prevent leakage. The blanking caps are primarily for keeping dust and contaminants out of the motor during transport.
After removing the blanking caps, take the two 1/2″ PSP hydraulic hoses and screw them into the drive unit. Each hose will have a male and female fitting on either end, and on the female end of the hose, there will be two male-male adapters, one side of which will have a rubber dowty seal. Fit these male-male adaptors into the drive unit, ensuring the washer seal faces the port on the hydraulic motor.
A quick tip when attaching the hydraulic hoses: put the bottom one in first. This makes it easier to reach with a 27-millimetre spanner, the only tool you’ll need for this task. Tighten the bottom hose first with your spanner, then follow up with the top one. After that, you simply connect the female ends of your hydraulic hoses to the hydraulic motor.
Please note that quick release couplers are not included with our drive units. We can supply couplers to suit your machine, but as standard, they do not come in the box. Once you acquire your relevant couplers, they just screw straight onto the male end of the hose.
Remember, there is no specific order for these hoses or how you arrange your couplers. The drive unit rotates both clockwise and anti-clockwise and requires a double-acting hydraulic circuit, meaning there is no right and wrong way to fit these hoses.
Wrapping Up
Setting up your drive unit is fairly straightforward, and this method applies throughout the range of Auger Torque S4 drive units. However, remember that for the S5 drives, the setup process remains similar, but the hoses are larger, and it’s not 1/2″ BSP.
For a visual guide, we will be following up with a video showing you how to attach the cradle or hitch bracket, which pins through the top of your drive unit using the provided pin. If you’ve got any questions or need more information about our range of Auger Torque attachments, please visit our website at mousevalley.com, leave a comment, or give us a call. Our contact numbers and a WhatsApp number are available on the website. We also encourage you to subscribe to our YouTube channel and follow us on Instagram, Facebook, and TikTok to keep up to date with our latest news.
We hope this guide proves helpful as you set up your new Auger Torque Drive unit. However, we understand that you may still have queries or require additional assistance. Don’t hesitate to reach out to our friendly and knowledgeable team for further help or information. Visit our contact page and leave us a message. We’re dedicated to ensuring that your experience with our products is as smooth as possible. Remember, at Mouse Valley Equipment, we’re always here to help.
