Posted on

Revolutionising Crushing with the Award-Winning Auger Torque Cone Crusher Bucket

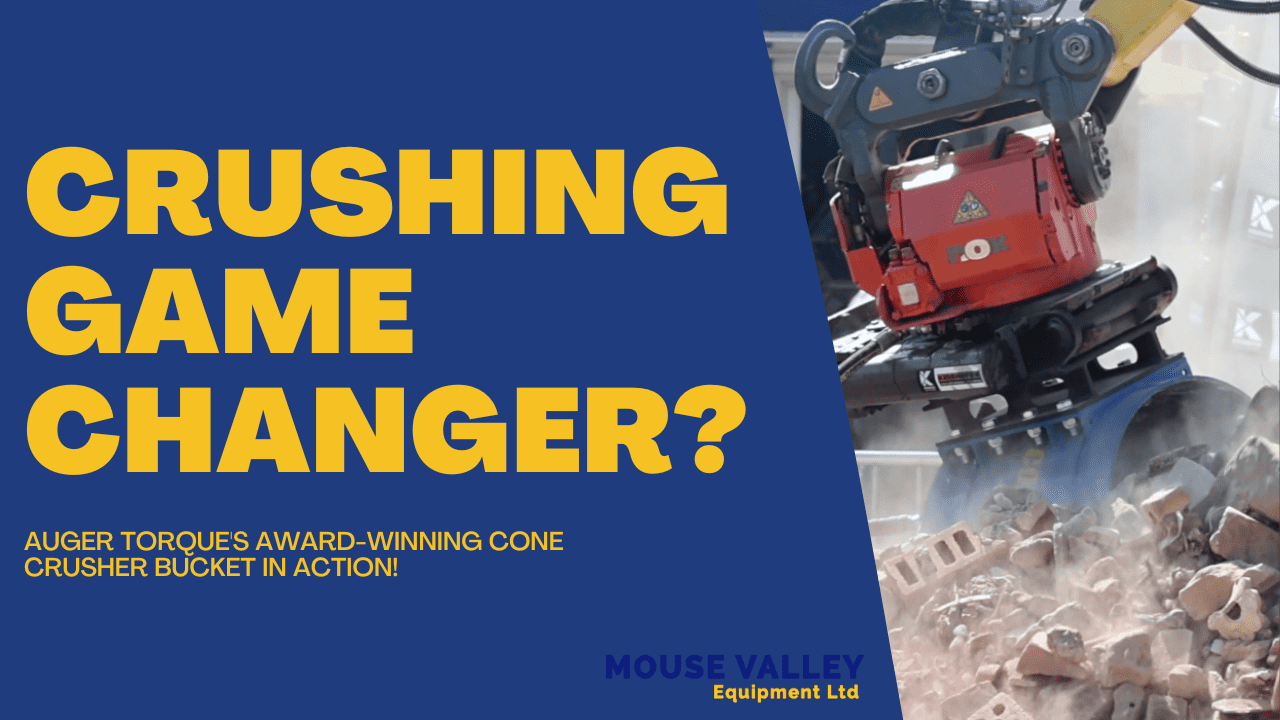
Today, we have something truly innovative to share with you. We’re delighted to introduce the Auger Torque Cone Crusher Bucket – a ground-breaking attachment that is already making waves in the industry.

Award-Winning Innovation

Last night, the Auger Torque Cone Crusher Bucket received the runner-up award for Environmental Initiative at the prestigious PlantWorx auto show. This award serves as a testament to our commitment to sustainable and environmentally friendly crushing solutions.

Reimagining Crushing

Unlike conventional jaw crushers, which use two Hardox plates on rams to crush material (an approach that isn’t best suited for materials like asphalt), the Cone Crusher Bucket employs a rotating 7-sided cone with tungsten tip agitators. The result? It absolutely obliterates material, transforming construction rubble into a useful Type 1 aggregate.

Versatility at its Best

What makes this product even more remarkable is its versatility. The Cone Crusher Bucket can be used on skid steer loaders, telehandlers, and even JCB Loadalls. Additionally, it fits perfectly with excavators ranging from the 3 to 10-ton mark. With this one product, you can handle multiple materials without any problem, all at an accessible price point.

Quality and Local Support

As an official dealer and stockist of Auger Torque attachments, Mouse Valley Equipment Ltd is proud to offer the Cone Crusher Bucket among our product range. Being a UK-based company, we not only hold stock but also conduct the final manufacturing and assembly of these high-quality attachments right here in the UK.

Learn More and Watch in Action

You can learn more about this revolutionary product on our website [here]. For an even closer look at the Cone Crusher Bucket in action, don’t miss our latest YouTube video featuring Bryn Bailey, the Sales Manager at Auger Torque, as he provides an in-depth explanation of the product’s features, benefits, and operation.

The Auger Torque Cone Crusher Bucket is just one of the ways we at Mouse Valley Equipment Ltd are working to bring you the most innovative and effective equipment solutions. Stay tuned to our blog and social media channels for more product updates, company news, and industry insights!

Posted on

Unboxing and Setting Up Your Auger Torque Drive Unit: A Comprehensive Guide

Unboxing and Setting Up Your Auger Torque X2500 Drive Unit: A Comprehensive Guide

Unboxing and Setting Up Your Auger Torque Drive Unit: A Comprehensive Guide

We’re going to walk you through the contents of your Auger Torque drive unit package and how to set it up. This applies throughout the range of S4 drive units, from the X1500 through to the 4500MAX.

Unboxing Your Drive Unit

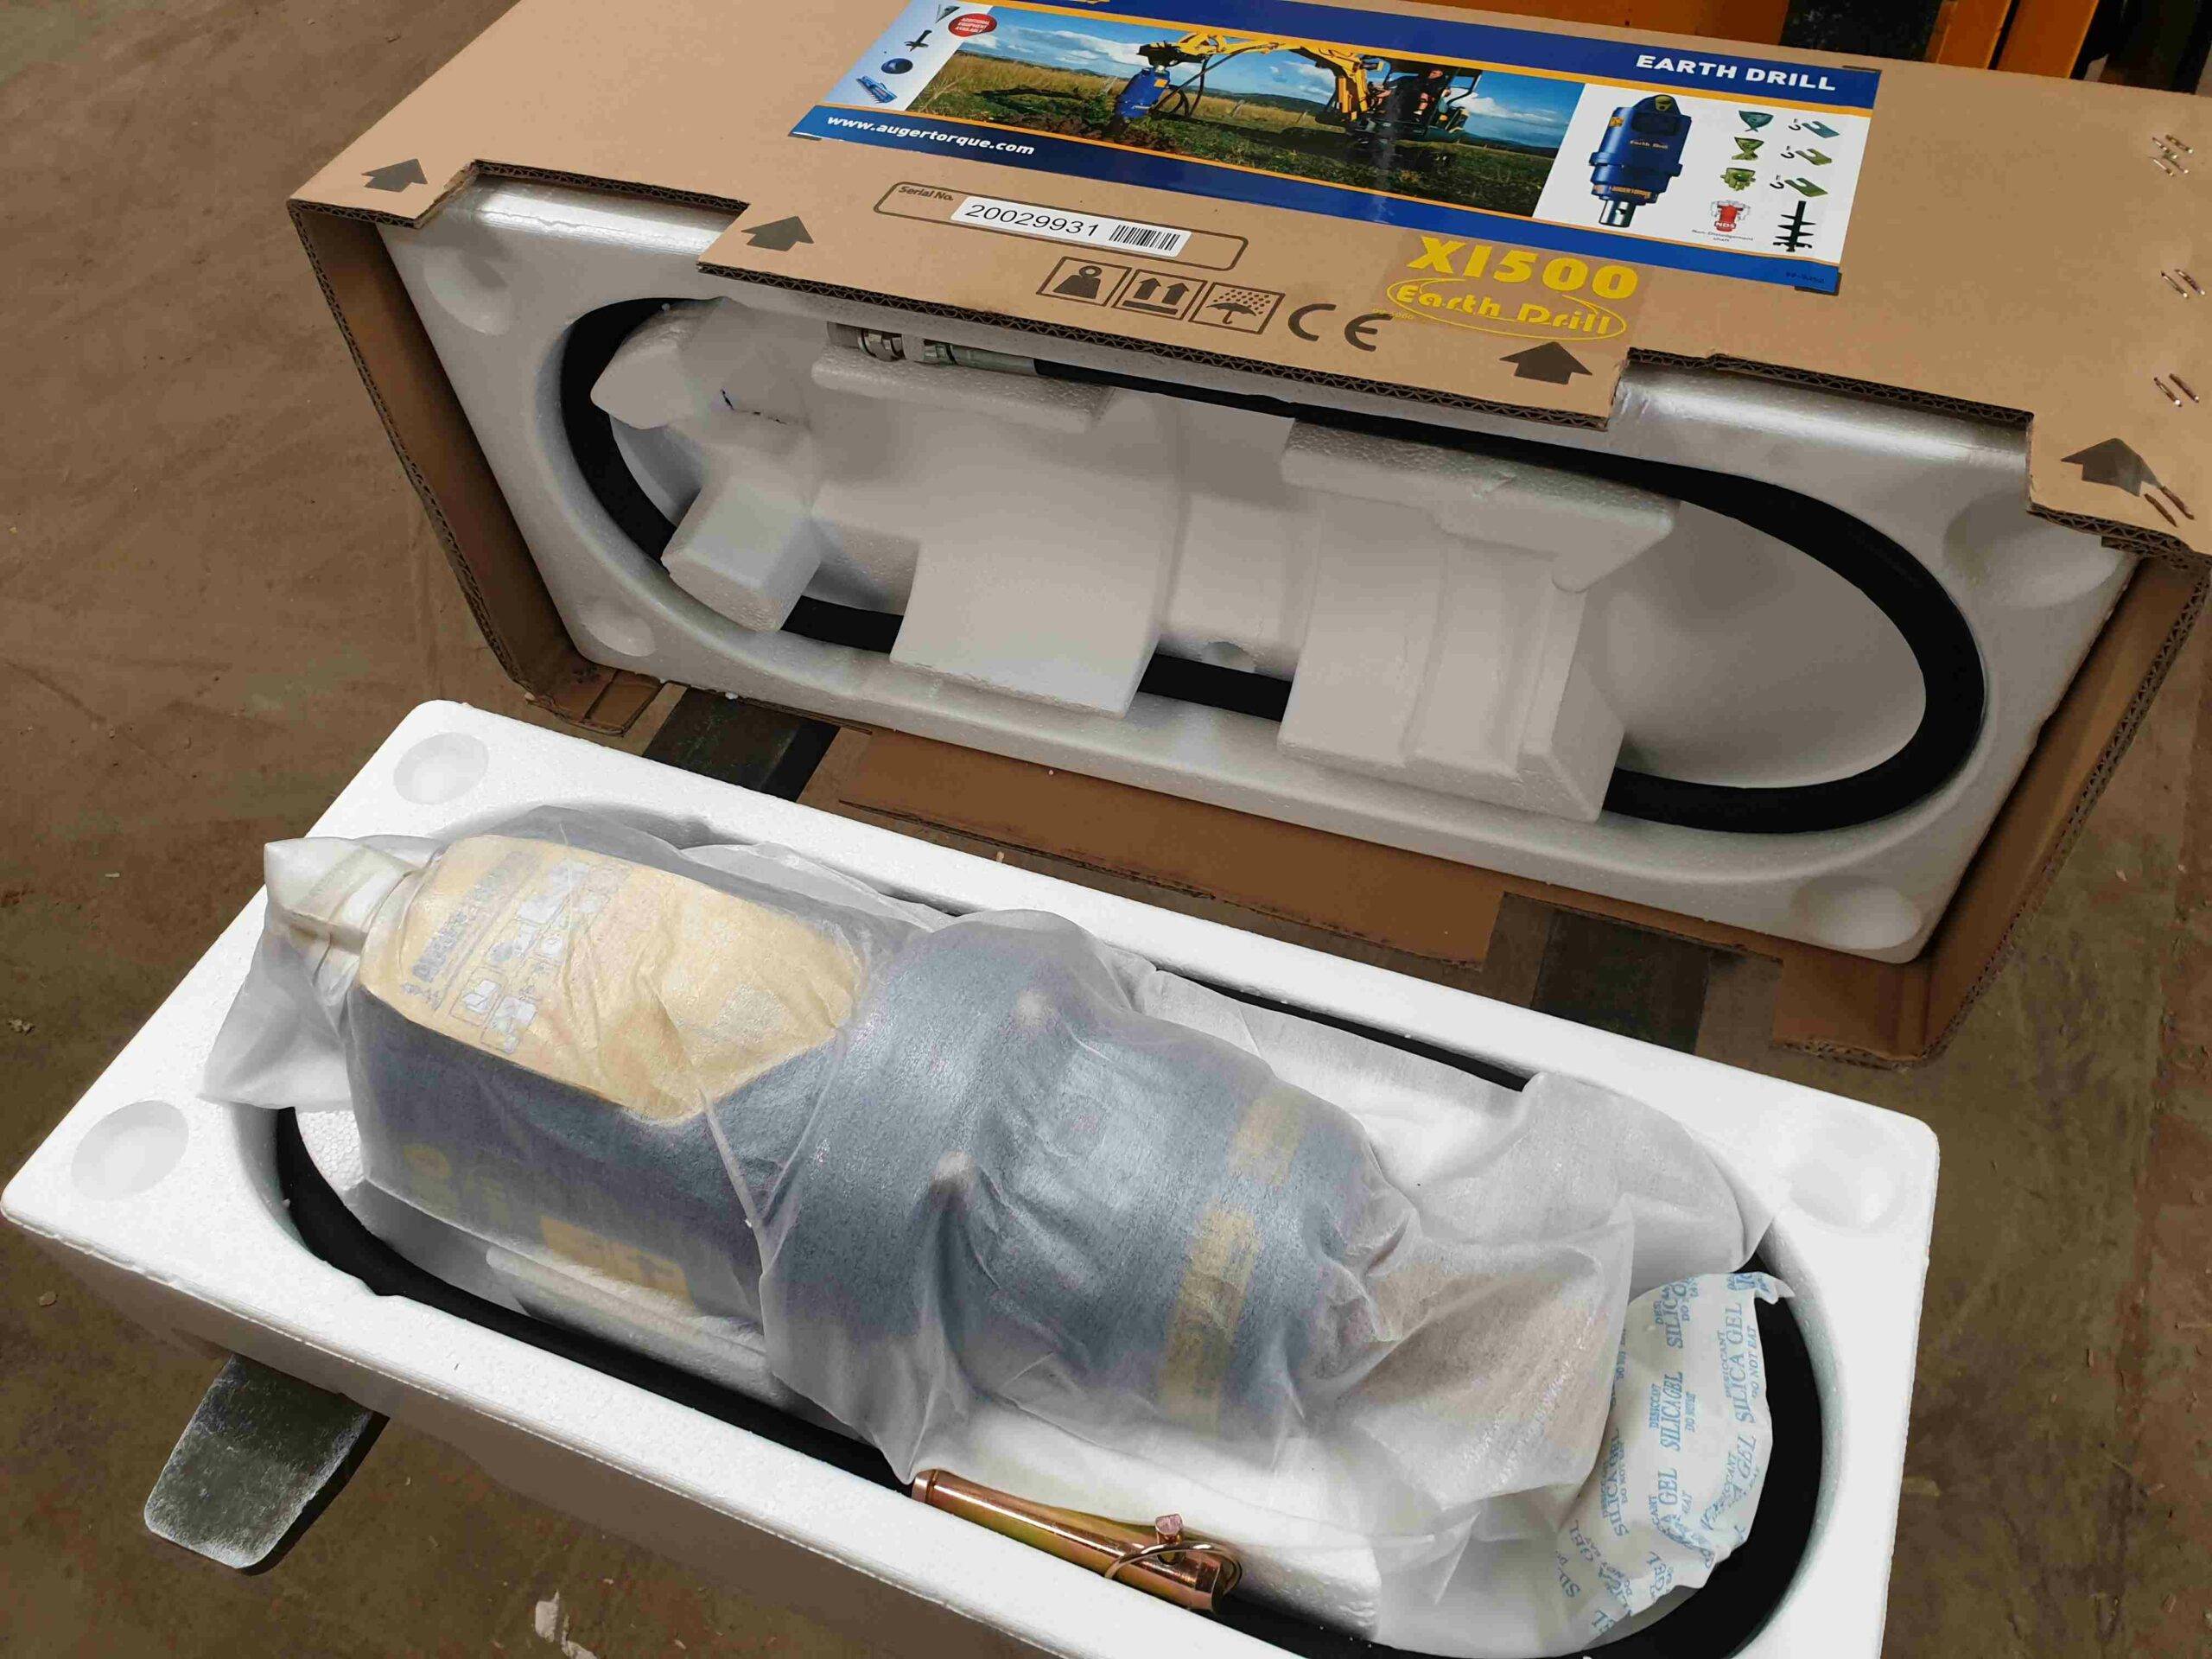
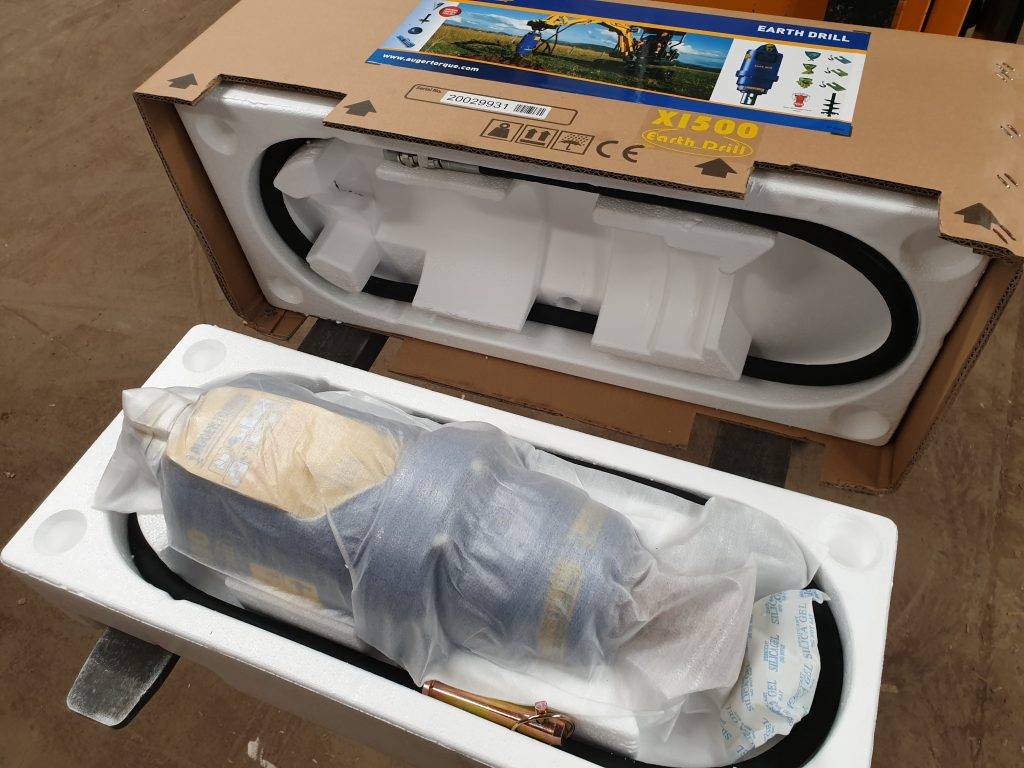
When your drive unit arrives, it will come in a box whether it’s a standalone drive unit or part of a package. Inside the box, you’ll find the main drive unit, an auger retaining pin and clip, and two hydraulic hoses. One hose is located at the bottom of the box, and the other is tucked away in the lid of the box.

Upon unpacking, you’ll notice that the drive unit comes with a warranty card that contains vital running-in details and instructions on how to register your warranty. You can either send the card back to us or register online via the provided URL.

Setting Up Your Drive Unit

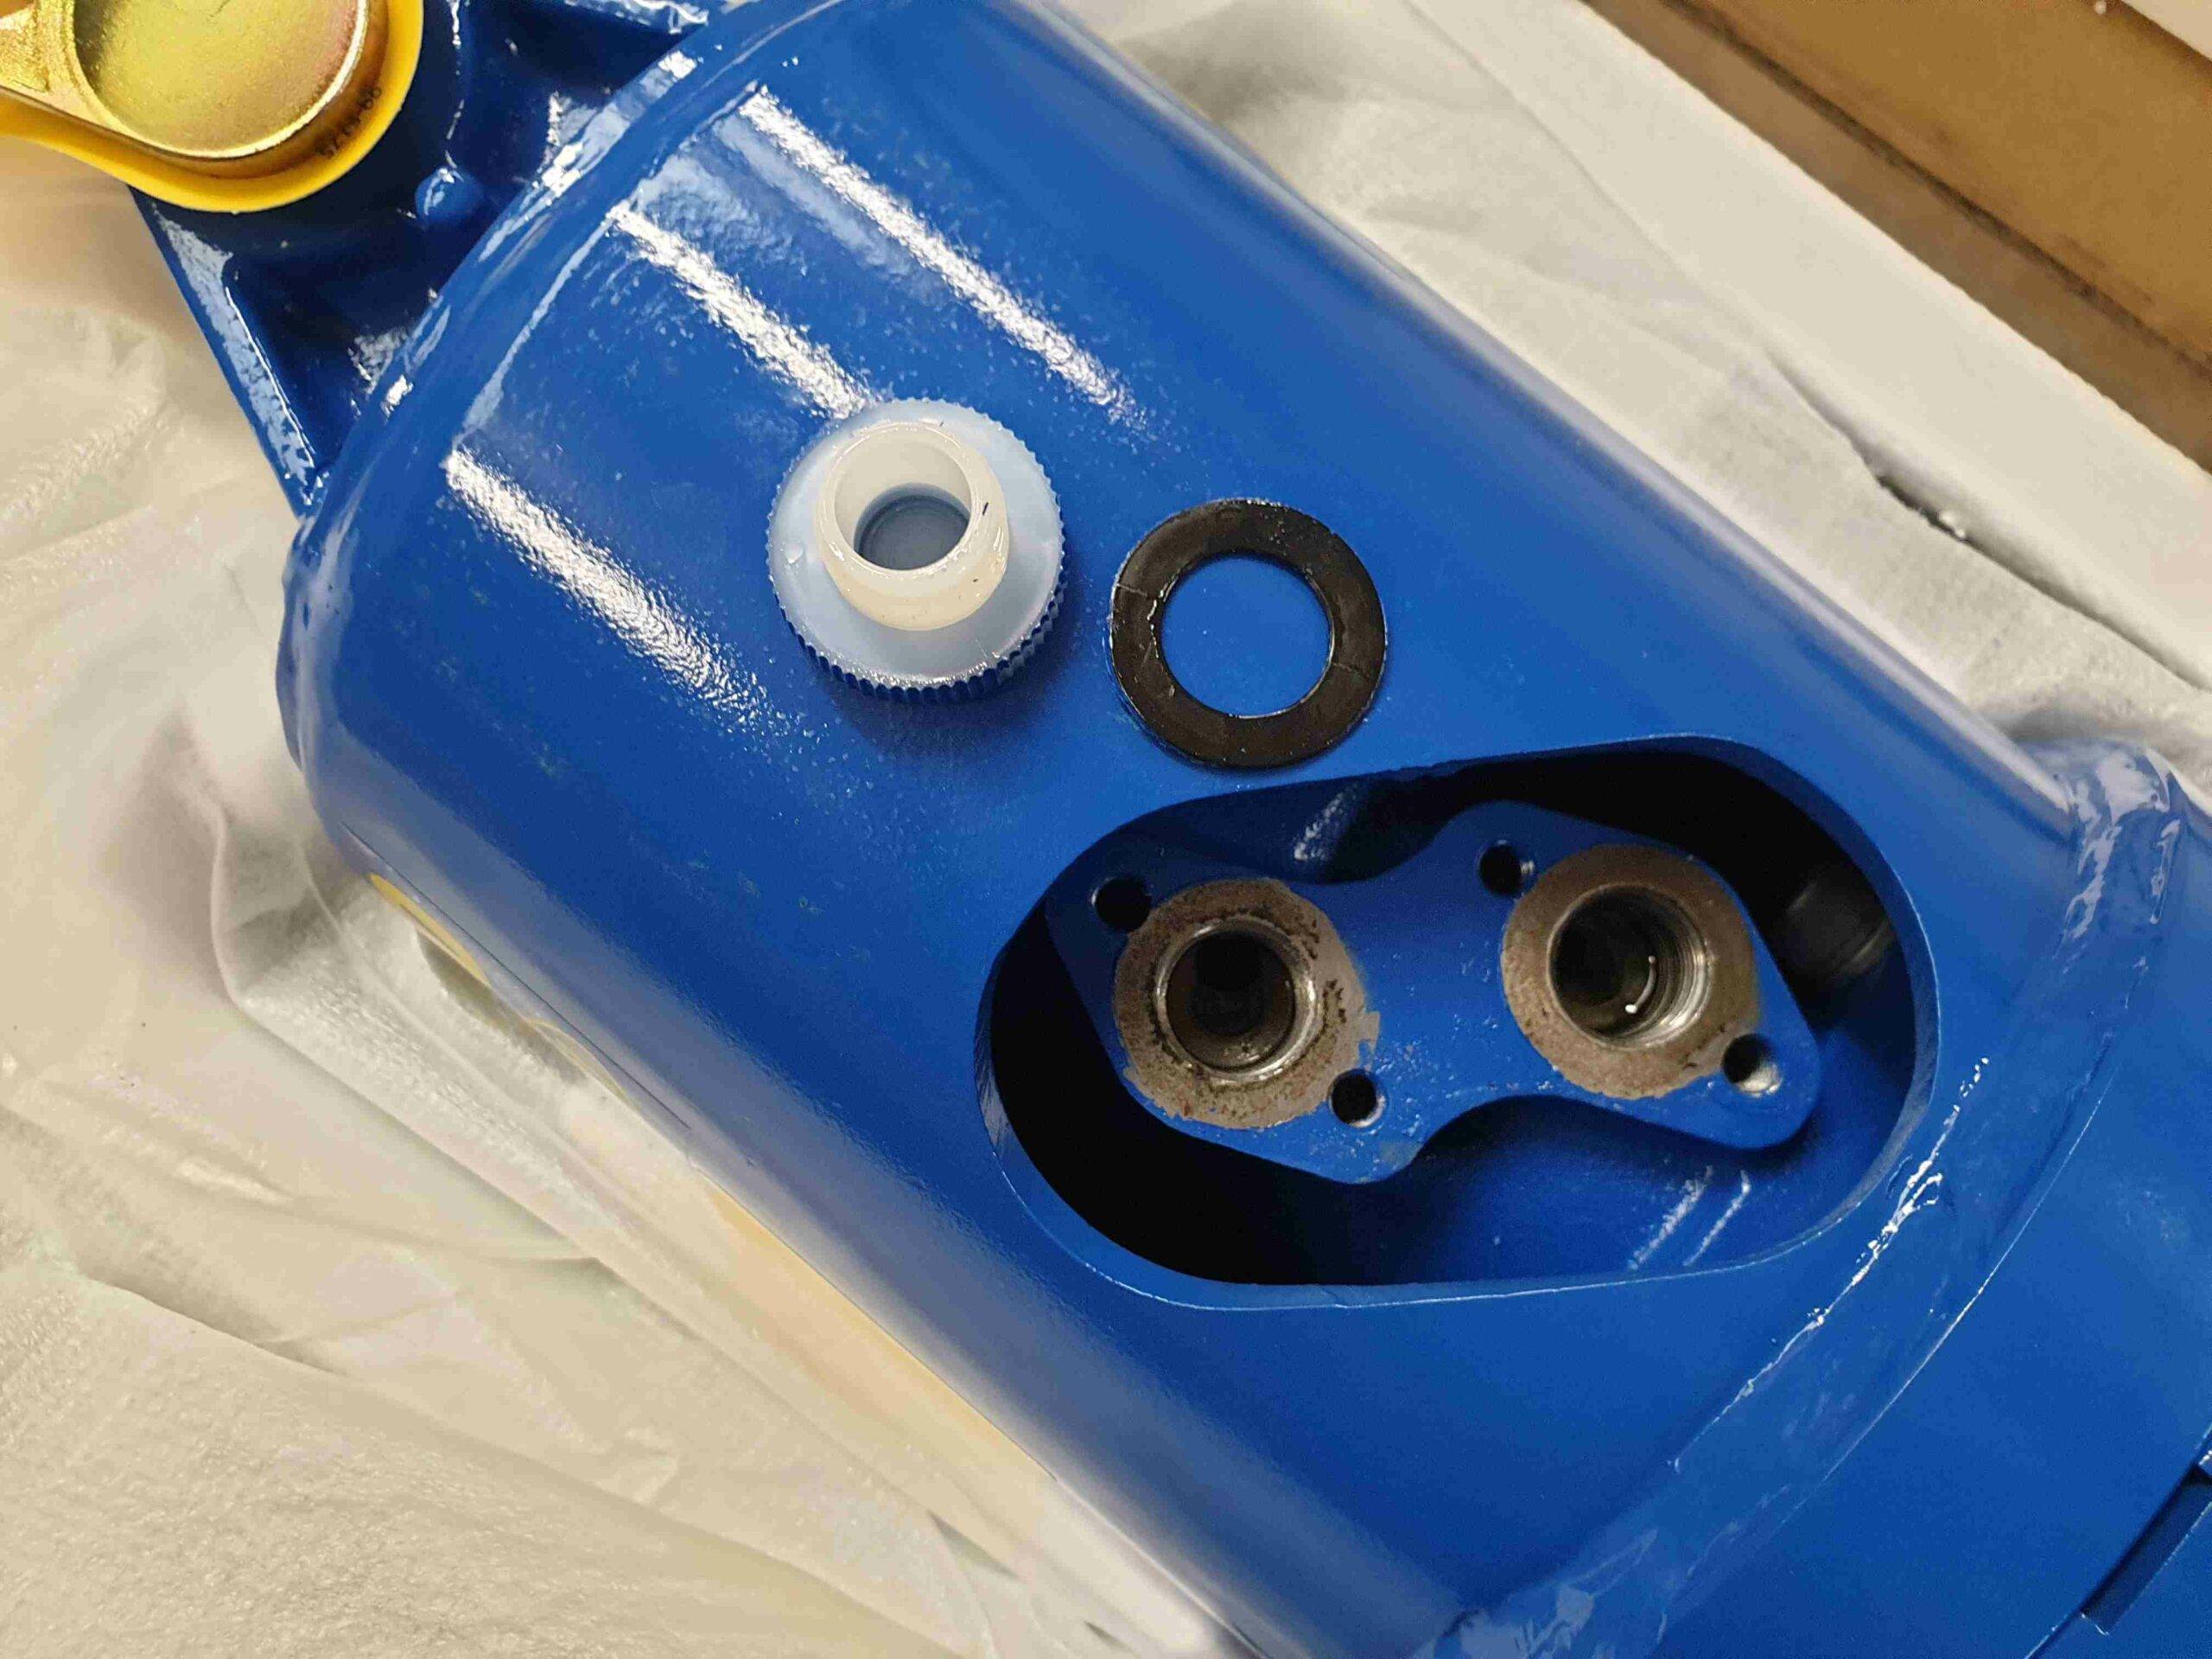
As you prepare to set up your drive unit, you will find two hydraulic hose ports in the motor with blanking caps on them. For the S4 range, they are 1/2″ BSP. The first step is to remove both blanking caps, ensuring to take off the rubber seals to prevent leakage. The blanking caps are primarily for keeping dust and contaminants out of the motor during transport.

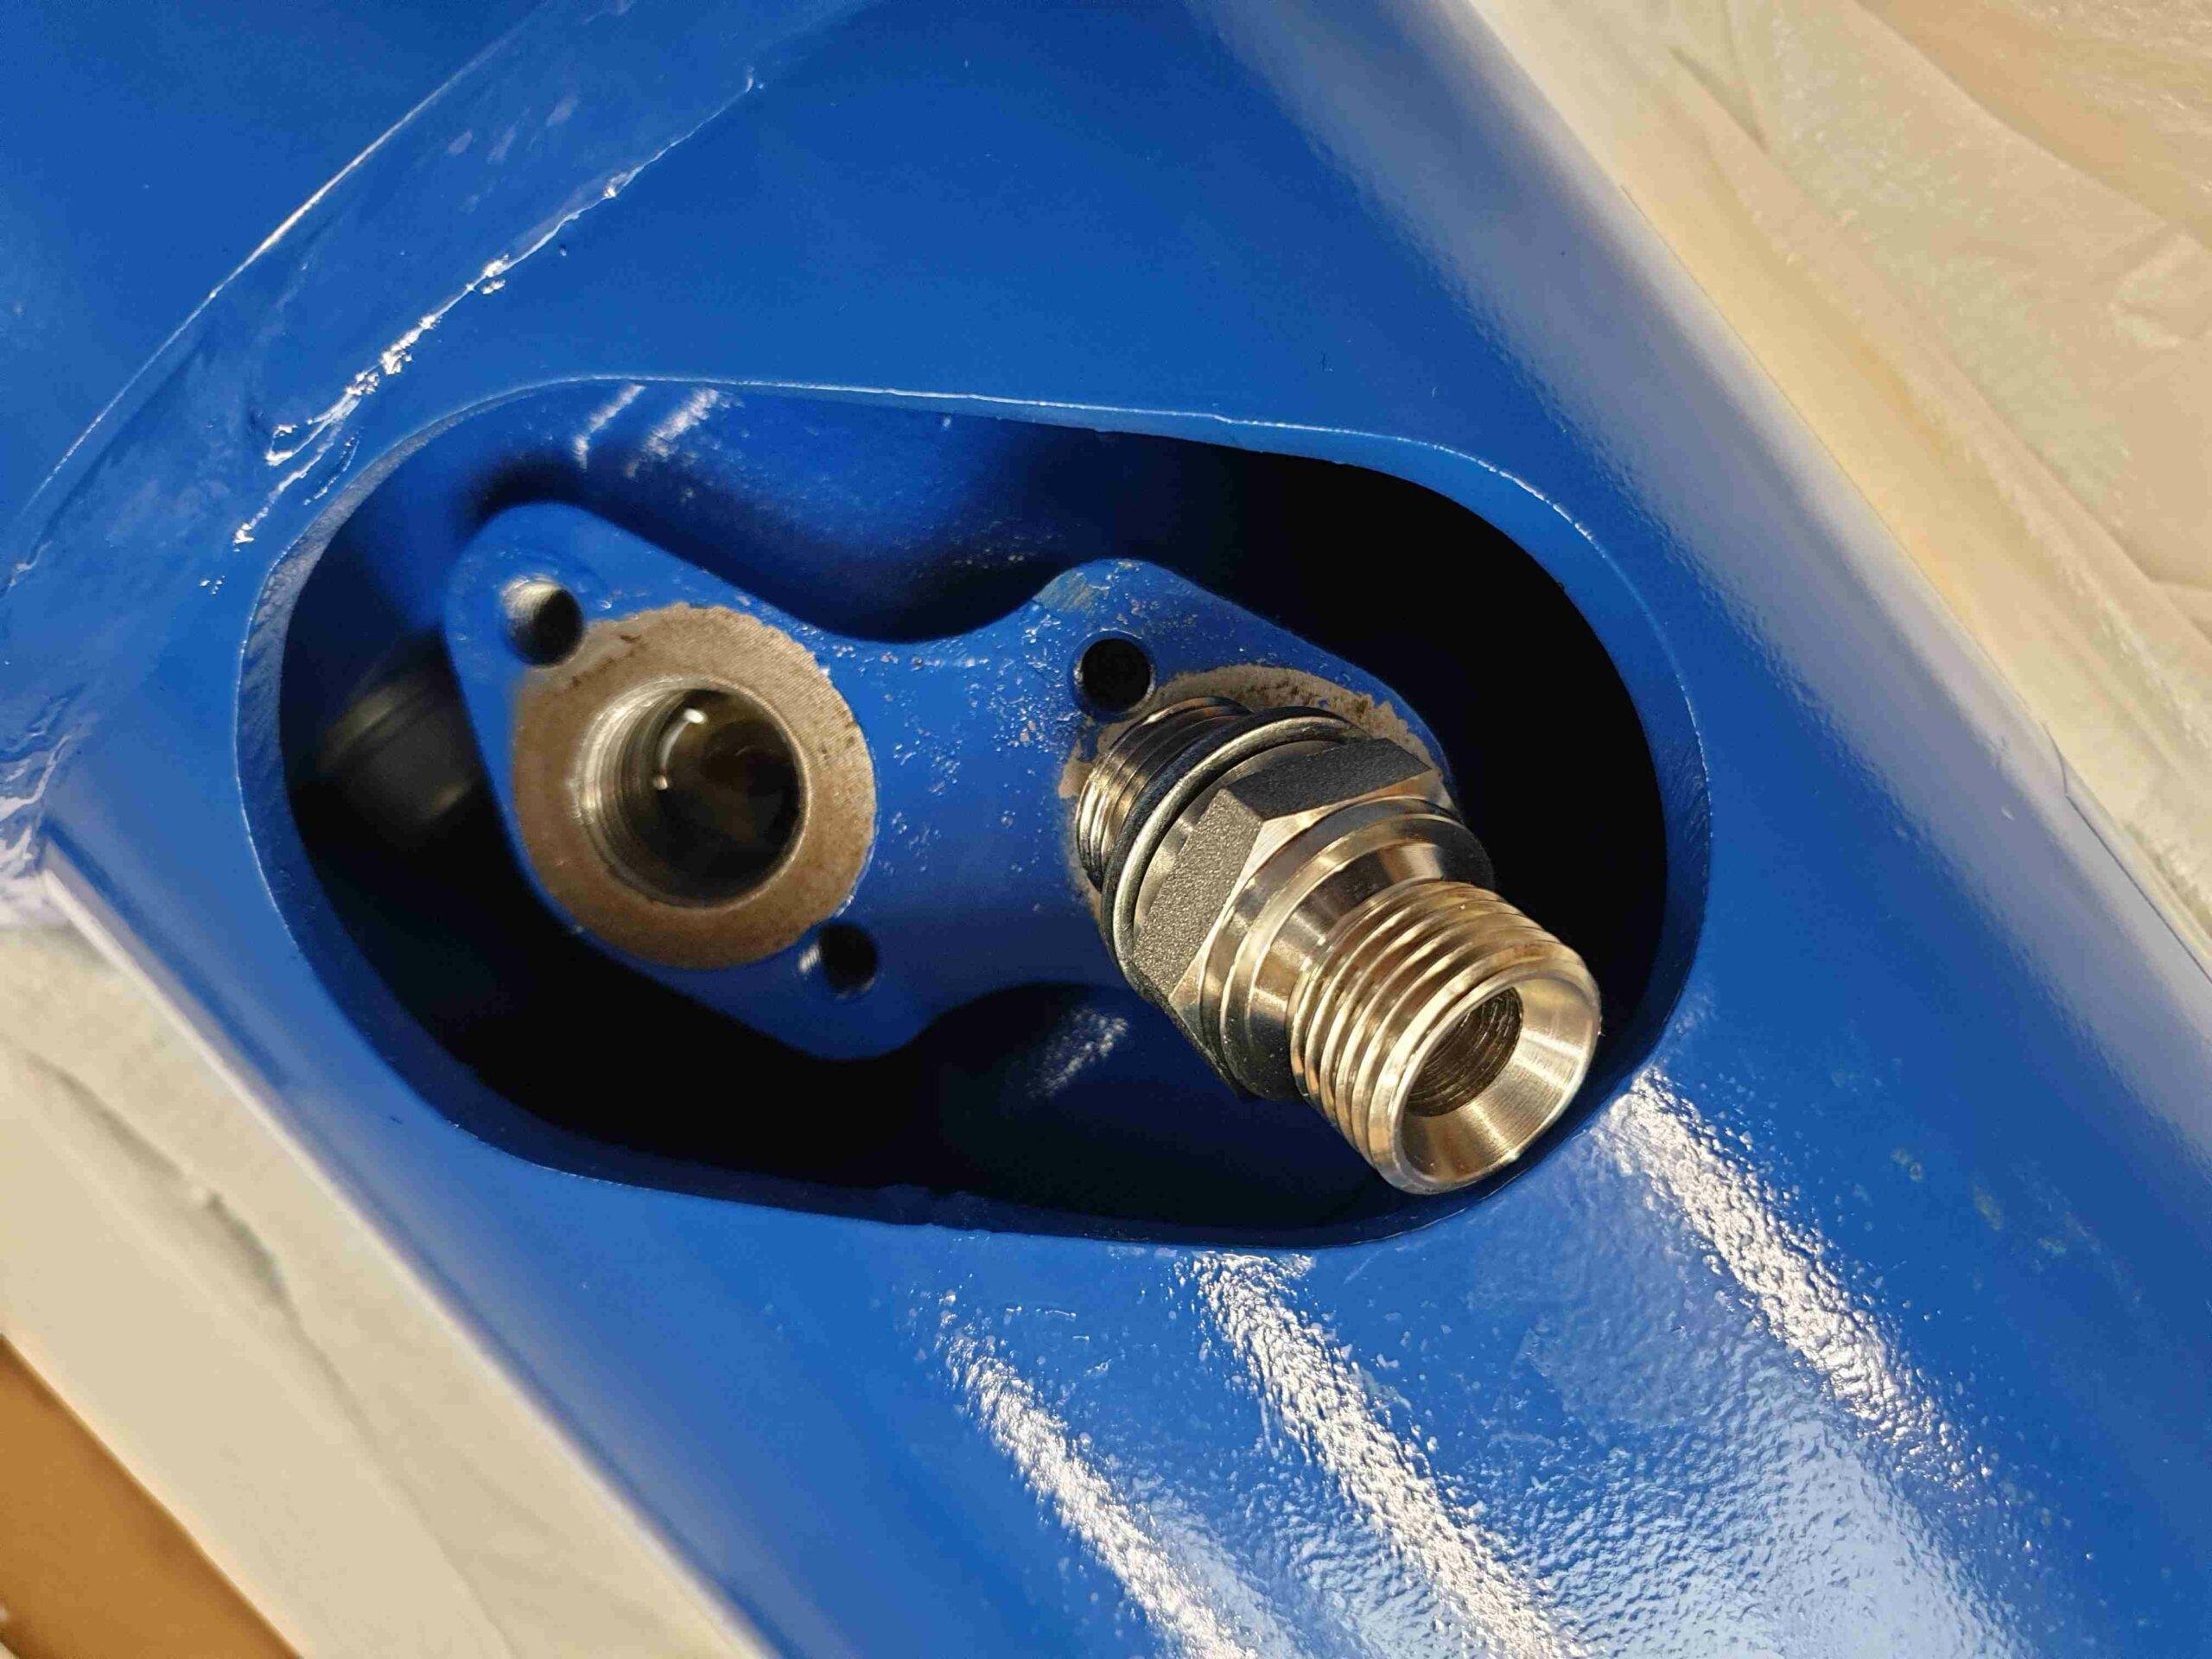
After removing the blanking caps, take the two 1/2″ PSP hydraulic hoses and screw them into the drive unit. Each hose will have a male and female fitting on either end, and on the female end of the hose, there will be two male-male adapters, one side of which will have a rubber dowty seal. Fit these male-male adaptors into the drive unit, ensuring the washer seal faces the port on the hydraulic motor.

A quick tip when attaching the hydraulic hoses: put the bottom one in first. This makes it easier to reach with a 27-millimetre spanner, the only tool you’ll need for this task. Tighten the bottom hose first with your spanner, then follow up with the top one. After that, you simply connect the female ends of your hydraulic hoses to the hydraulic motor.

Please note that quick release couplers are not included with our drive units. We can supply couplers to suit your machine, but as standard, they do not come in the box. Once you acquire your relevant couplers, they just screw straight onto the male end of the hose.

Remember, there is no specific order for these hoses or how you arrange your couplers. The drive unit rotates both clockwise and anti-clockwise and requires a double-acting hydraulic circuit, meaning there is no right and wrong way to fit these hoses.

Wrapping Up

Setting up your drive unit is fairly straightforward, and this method applies throughout the range of Auger Torque S4 drive units. However, remember that for the S5 drives, the setup process remains similar, but the hoses are larger, and it’s not 1/2″ BSP.

For a visual guide, we will be following up with a video showing you how to attach the cradle or hitch bracket, which pins through the top of your drive unit using the provided pin. If you’ve got any questions or need more information about our range of Auger Torque attachments, please visit our website at mousevalley.com, leave a comment, or give us a call. Our contact numbers and a WhatsApp number are available on the website. We also encourage you to subscribe to our YouTube channel and follow us on Instagram, Facebook, and TikTok to keep up to date with our latest news.

We hope this guide proves helpful as you set up your new Auger Torque Drive unit. However, we understand that you may still have queries or require additional assistance. Don’t hesitate to reach out to our friendly and knowledgeable team for further help or information. Visit our contact page and leave us a message. We’re dedicated to ensuring that your experience with our products is as smooth as possible. Remember, at Mouse Valley Equipment, we’re always here to help.

Posted on

Where is Auger Torque Made? Over a Decade of Global Reach!

Where is Auger Torque Made? Over a Decade of Global Reach

Welcome to Mouse Valley Equipment Ltd. As one of the largest distributors of Auger Torque hydraulic excavator, mini loader, and skid steer attachments in the UK, we’re often asked, “Where is Auger Torque made?”. Let us answer that for you!

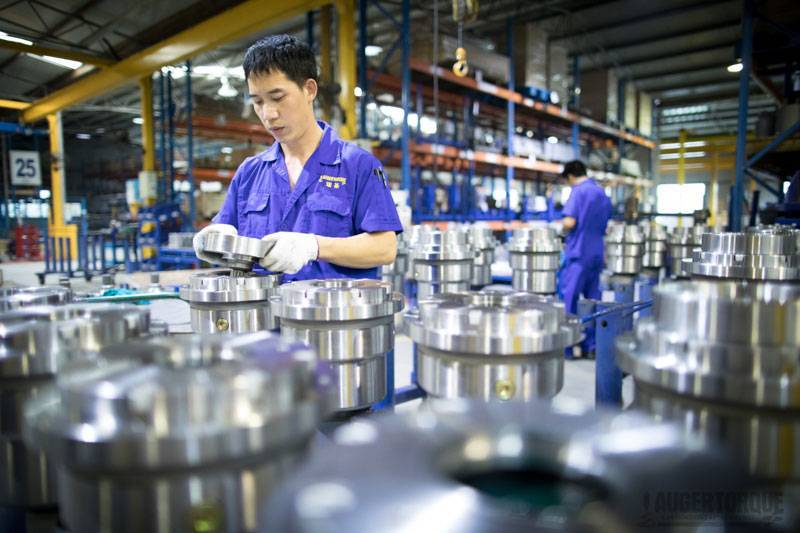
Back in 2009, Auger Torque was enjoying substantial global growth with an increasing demand for their products. However, the company faced a challenge: How could they accommodate this rapid expansion while maintaining the highest quality products at the best price? The answer lay in a purpose-built manufacturing facility strategically located in Ningbo, China.

Ningbo: The Optimal Choice for Auger Torque’s Manufacturing Base

Ningbo was chosen due to its proximity to the bustling Ningbo port, one of the world’s busiest, providing convenient distribution to the global marketplace. This ideal location facilitated the efficient transport of Auger Torque’s high-quality hydraulic attachments, enhancing the brand’s capacity to cater to an international clientele.

Within just five years, the original factory had become too small to accommodate the company’s burgeoning needs. This rapid expansion necessitated a move to a larger, 98,000 square foot premises. Over this time, Auger Torque’s staff grew from 18 to 80 employees, underlining the tremendous growth of the operation.

Commitment to Excellence and Efficiency

The Ningbo facility operates according to the highest standards of quality initiatives, incorporating lean manufacturing and 5S principles into its daily operations. These practices ensure top-tier production capability and efficiency, lowering manufacturing costs while enabling prompt responses to market demands.

Under the watchful eye of Matt Hencher, Global Production Manager, quality control is a top priority. According to Hencher, “The most important aspect for our customers is that the product is of the quality and standard that they expect and need.” To this end, all gear steel, a critical component in their attachments, is sourced from Europe before being dispatched to the China facility.

Auger Torque places great emphasis on the origin of its components. All other parts are sourced from heavily vetted suppliers, selected for their proven quality. Prior to product builds in China, all R&D, testing, prototype builds, and Factory Acceptance Testing (FAT) are conducted by the global team based in Europe, USA, and Australia.

Steady Growth and Global Expansion

Since the facility’s inception in 2009, its global reach has been impressive. What started with 60 containers exported in the first year has expanded to an average of 25 containers leaving China each month, headed for every continent.

Alistair Brydon, Group Managing Director, emphasizes the importance of the Chinese manufacturing site, stating, “The manufacturing site in China demonstrates our commitment to supporting our customers and our marketplace.” Brydon attributes the company’s success to its dedicated employees, whose commitment to excellence fuels Auger Torque’s competitiveness.

The Future of Auger Torque

As Auger Torque moves into its next decade of production, the company pledges to continue improving its manufacturing capabilities worldwide. They plan to stay competitive by continually evolving, embracing changes in technology, and improving processes to remain customer-centric.

So, the next time you see an Auger Torque hydraulic excavator, mini loader, or skid steer attachment from Mouse Valley Equipment Ltd, remember the journey it’s taken from the state-of-the-art facility in Ningbo, China, to your hands. Rest assured knowing it was built by a global leader committed to quality, efficiency, and customer satisfaction.

For further information on our Auger Torque hydraulic excavator, mini loader, and skid steer attachments, please don’t hesitate to get in touch with us at Mouse Valley Equipment Ltd. Our team is always ready and willing to provide expert guidance and assist with any inquiries you may have. As the leading distributor of these globally recognized products, we’re more than capable of answering your questions and helping you find the best equipment for your needs. Reach out to us today and let us help you experience the quality and excellence of Auger Torque.

CONTACT US!

If you’re based in the United States and looking for reliable, top-of-the-line Auger Torque attachments, our sister company, The Attachment Company in Denver, Colorado, is your go-to solution. As the largest distributor of Auger Torque hydraulic attachments in the UK, we have extended our reach across the pond to better serve customers in the United States. Visit their website at www.attachmentco.com to browse their comprehensive range of products or to get in touch with their experienced team for expert guidance and support. The Attachment Company is dedicated to delivering the same level of quality and excellence that you’ve come to expect from Auger Torque and Mouse Valley Equipment Ltd.

Posted on

Measuring Excavator Bucket Pins for a Perfect Attachment Fit

ow to Measure Excavator Bucket Pins for a Perfect Attachment Fit

How to Measure Excavator Bucket Pins for a Perfect Attachment Fit

Excavator attachments are essential tools for construction projects, and finding the right attachment is critical for efficient and safe operation. One of the most important factors in selecting the right attachment is ensuring that it fits your machine’s bucket pins accurately. Failing to measure your excavator bucket pins correctly can lead to safety risks and damage to your equipment.

In this post, we will outline the steps you should follow to measure your excavator bucket pins accurately for a new attachment.

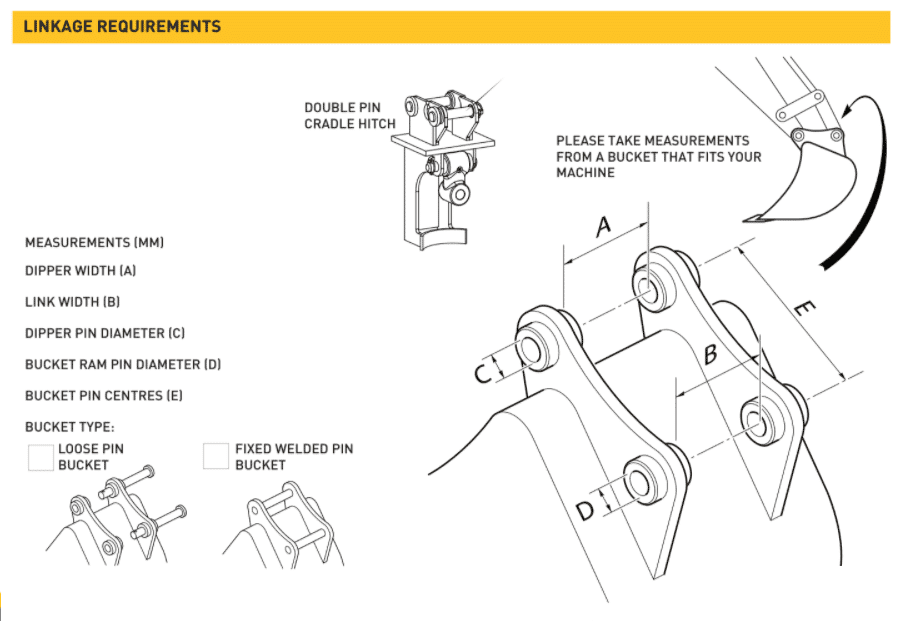
Step 1: Determine the Pin Diameter

The first step is to determine the pin diameter. This measurement is the most critical in finding the right attachment for your machine. To measure the pin diameter, use a caliper or measuring tape to measure the distance between the outer edges of the pin. Take multiple measurements at different points along the pin to ensure accuracy.

Step 2: Measure the Dipper Width

Once you have determined the pin diameter, measure the dipper width or “gap between the ears”. This measurement is crucial to ensure that the attachment you select has the correct pin length to fit your machine. To measure the dipper width, measure between the sides of your existing bucket hangers. Take multiple measurements at different points along the pin to ensure accuracy.

Step 3: Check the Pin-to-Pin Center Distance

The final step is to check the distance between the centers of the two pins. This measurement is crucial in ensuring that the attachment you choose is compatible with your machine. To check the pin-to-pin center distance, measure the distance between the centers of the two pins. Take multiple measurements at different points to ensure accuracy.

Conclusion

Measuring your excavator bucket pins accurately is crucial in ensuring that the attachment you choose fits your machine properly. It’s essential to take multiple measurements at different points along the pin to ensure accuracy. If you’re unsure about how to take these measurements or want to ensure that your attachment fits your machine perfectly, contact us!

Remember, prioritizing safety and accurate measurements when selecting a new excavator attachment will help you avoid safety risks and damage to your machine.

Please refer to the below diagram for referance

ow to Measure Excavator Bucket Pins for a Perfect Attachment Fit
Posted on

Auger Torque X2500: The Perfect Solution for Mini Digger Drilling

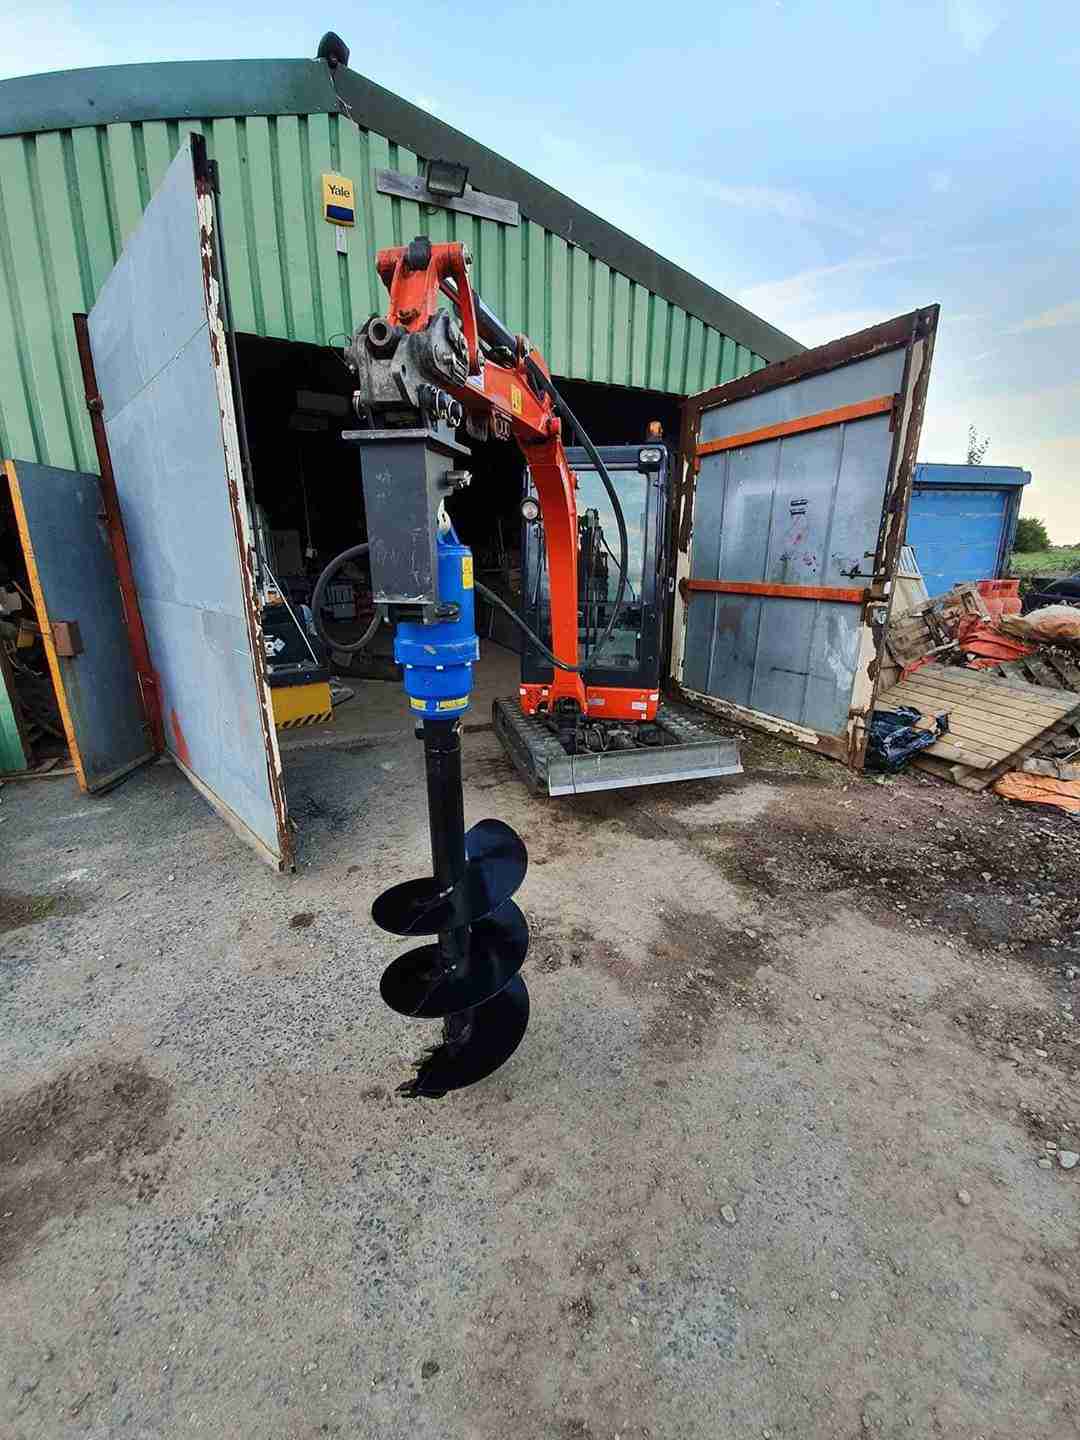
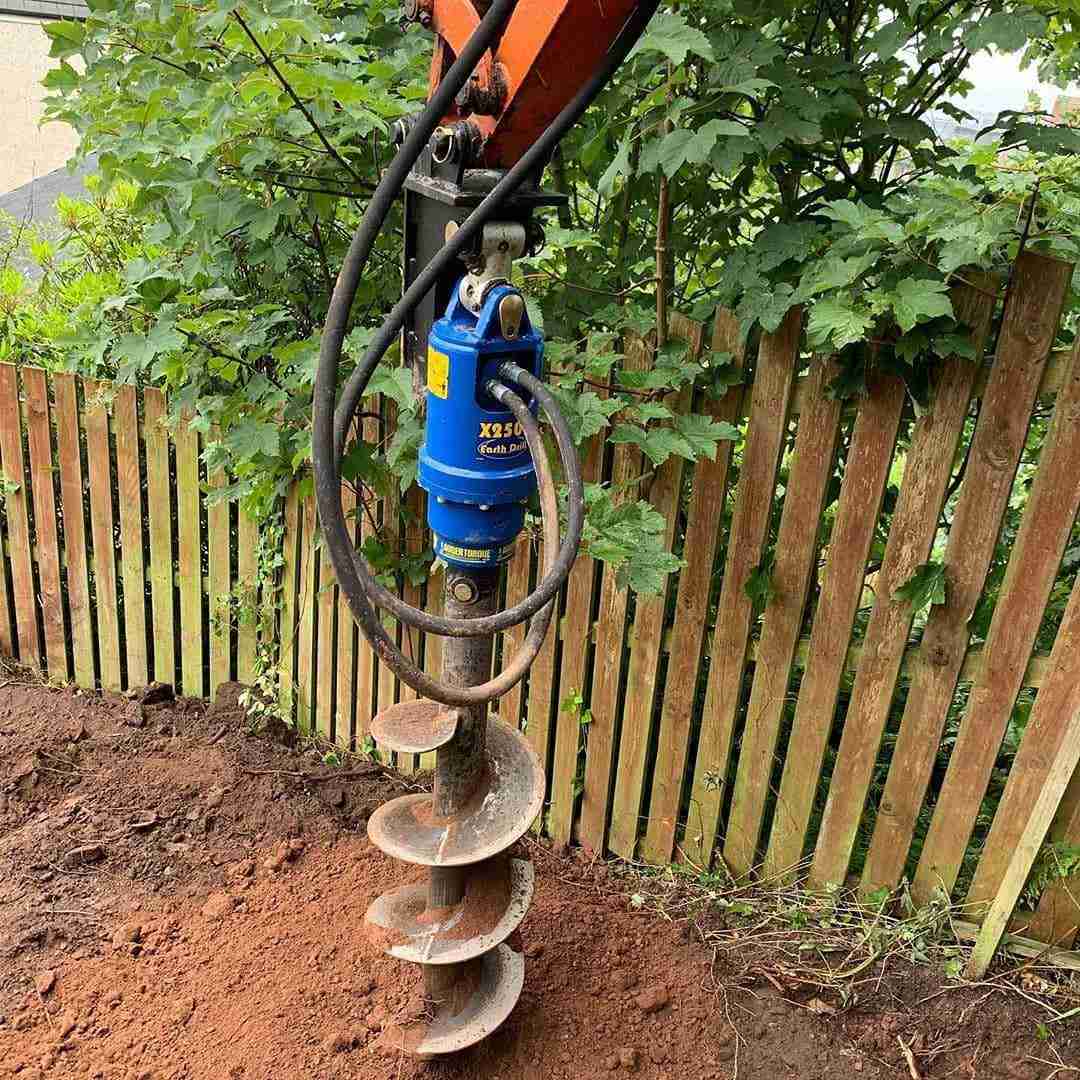
Auger Torque X2500 mini digger auger package on a Kubota KX016

Auger Torque X2500: The Perfect Solution for Mini Digger Drilling

The Auger Torque X2500 is a versatile earth drill unit that is perfect for mini diggers in the 1.5t to 2.8t range. This unit is commonly used by fencing contractors, building contractors, landscapers, and hire fleets. Some of the most popular excavators it can be fitted to include the Bobcat E19, Takeuchi TB216, Takeuchi TB219, and JCB 8018 mini excavators. The X2500 package with a cradle hitch and tungsten auger up to 300mm diameter makes it the best option for drilling holes with your mini digger.

Setting Up the X2500 on Your Machine

The Auger Torque X2500 is easy to set up on your mini digger. The drive unit, hoses, hitch bracket, and auger are all included in the package. The only additional item you’ll need is a suitable hydraulic coupler for your excavator, which is not included. The cradle hitch is fitted to the X2500 earth drill with a single bolt and a 32mm nyloc nut that can be tightened with an adjustable spanner. The hydraulic hoses are also supplied with the unit and are fitted with a male-male adapter that should be fitted to the X2500 side of the hose.

Ground Conditions for X2500 Usage

The X2500 package comes with the S4 Tungsten Auger, which is best suited to dry, hard, or medium ground conditions where floating rocks may be encountered. The patented Shock Lock™ Tooth Locking System minimizes the chance of tooth loss, making it the perfect all-rounder auger option for mini diggers.

Maintenance of the X2500 Unit

The X2500 earth drill unit is low maintenance but still requires regular checks for oil leaks and following the service schedules to ensure it runs smoothly. The supplied operators manual details the service and maintenance information for your unit. It is recommended to grease all grease points on the hitch bracket and linkage block weekly. The gear housing of the X2500 drive unit is filled with gear oil, which should be changed initially after 3 months or 200 hours, and then every 800 hours or 12 months thereafter.

Maintenance of the Auger

To maintain the auger, make sure the teeth and pilot are intact and replaced before they become overly worn. These are serviceable parts and easy to change, and all wear parts for Auger Torque S4, S5, S6, and PA Auger ranges can be supplied. When using the Auger Torque X2500 Earth Drill, ensure that the cradle hitch is only used to guide the auger when starting your hole and that it is not putting pressure on the back of the drive unit after the auger has started drilling, as this has the potential to cause damage and bending to your auger.

When to Replace the Teeth and Pilot

The S4 auger supplied as standard with the Auger Torque X2500 package comes with the ShockLock Tungsten Teeth and Tungsten Pilot, which are very hard wearing and capable of continuous use in hard ground conditions. When the tungsten tips on the teeth and the pilot are worn off, it’s time to replace the wear parts on your auger. If in doubt, you can send pictures of your auger

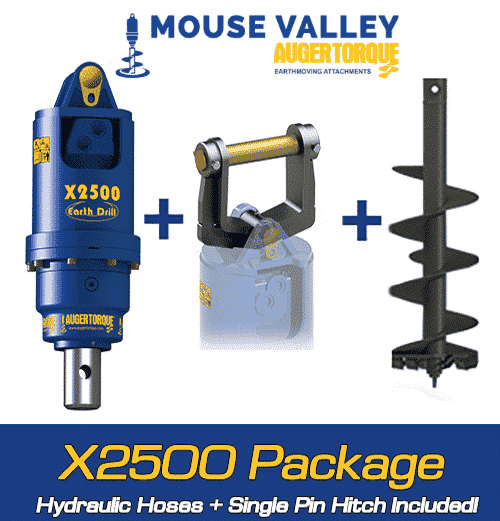
  • Auger Torque X2500 Budget Package c/w Single Pin Hitch and Auger (1.5-2.5t Excavators)

    £1,675.00 +20% VAT (£2,010.00)
    Select options
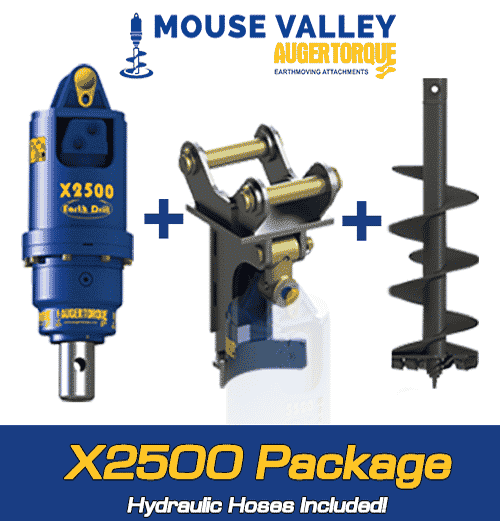
  • auger torque x2500 earth drill with cradle hitch and auger

    Auger Torque X2500 Package c/w Cradle Hitch and Auger (1.5-2.8t Excavators)

    £1,995.00 +20% VAT (£2,394.00)
    Select options
Posted on

Auger Torque X2500 Unit: Applications, Setup, and Maintenance

Auger Torque X2500 mini digger auger package on a Kubota KX016

Auger Torque X2500 Unit: Applications, Setup, and Maintenance

Introduction

The Auger Torque X2500 unit with cradle hitch is a great solution for drilling holes with your mini digger. It’s supplied with a tungsten auger up to 300mm diameter and is commonly used by fencing contractors, building contractors, landscapers, and hire fleets. The most popular excavators for this package are Bobcat E19, Takeuchi TB216, Takeuchi TB219, and JCB 8018 mini excavators.

Setting up the Auger Torque X2500 Unit

This auger package is easy to fit to your mini digger. The cradle hitch, drive unit, and augers will be delivered on a pallet. The cradle is easily fitted to the Auger Torque X2500 earth drill with a single bolt on the top of the drive and secured with a 32mm nyloc nut. The hydraulic hoses are supplied with the X2500 Earth Drill and need to be fitted to the drive unit with a 27mm spanner. For a full guide to fitting the hoses, please see our other post, “How to fit hydraulic hoses on your Auger Torque X1500.”

What’s included with the Auger Torque X2500 Unit

The X2500 auger package includes the Drive Unit, Hoses, Hitch Bracket, and Auger. The only additional thing you will require is suitable hydraulic couplers for your excavator, which are not supplied as standard with the package.

Applications of the Auger Torque X2500 Unit

The Auger Torque X2500 unit is a versatile piece of equipment that can be used for a variety of applications, including:

  • Fence post hole drilling
  • Tree planting
  • Planting of shrubs and bushes
  • Soil sampling
  • Light demolition work

Maintenance of the Auger Torque X2500 Unit

Regular maintenance of the X2500 unit is crucial to keep it in good working condition and extend its lifespan. The following steps should be followed to maintain the unit:

  • Inspect the hoses and fittings regularly for leaks, cracks, and signs of wear and tear
  • Check the oil levels in the drive unit regularly
  • Keep the drive unit clean and free from debris
  • Store the unit in a dry, covered place when not in use

By following these simple steps, you can ensure that your Auger Torque X2500 unit continues to perform at its best for years to come.

  • Auger Torque X2500 Budget Package c/w Single Pin Hitch and Auger (1.5-2.5t Excavators)

    £1,675.00 +20% VAT (£2,010.00)
    Select options
Posted on

Mini Digger Auger Package – Auger Torque X2500

auger torque x2500 earth drill with cradle hitch and auger

What applications can the Auger Torque X2500 unit be used for?

The X2500 package with cradle hitch is a perfectly suited mini digger auger package for 1.5t – 2.8t excavators. Supplied with 1x tungsten auger up to 300mm diameter. This is the best solution for drilling holes with your mini digger. 

Commonly used by fencing contractors, building contractors, landscapers and hire fleets.

The most popular excavators we fit this package to are Bobcat E19, Takeuchi TB216, Takeuchi TB219, JCB 8018 mini excavators.

How do I set this up on my machine?

This auger package is easily fitted to your mini digger. The cradle hitch, drive unit and augers will be delivered on a pallet. The cradle is easily fitted to the Auger Torque X2500 earth drill by a single bolt on the top of the drive, secured by a 32mm nyloc nut, this should be tightened with an adjustable spanner.

Hydraulic hoses are supplied with the X2500 Earth Drill – these need to be fitted to the drive unit with a 27mm spanner. The supplied ½” hydraulic hoses will be fitted with a male-male adapter, this should be fitted to the X2500 side of the hose. 

For a full guide to fitting the hoses on an Auger Torque mini digger earth drill please see our other post – How to fit hydraulic hoses on your Auger Torque X1500

auger torque x2500 earth drill with cradle hitch and auger
Mini Digger Auger package
Auger Torque X2500 mini digger auger package on a Kubota KX016

Is everything there ready to go?

Drive Unit, Hoses, Hitch Bracket and Auger are included in the X2500 auger package. The only additional thing you will require is suitable hydraulic couplers for your excavator – these are not supplied as standard with this package. We can supply these separately, if you know which size and style you require to suit your mini digger – hydraulic flat face quick release couplers.

What type of ground can I use this package on?

We supply this X2500 mini digger auger package with the S4 Tungsten Auger – the Auger Torque patented Shock Lock™ Tooth Locking System minimises the chance of tooth loss. 

Tungsten Augers are best suited to dry, hard or medium ground conditions where floating rocks may be encountered. The perfect all-rounder auger option for mini diggers. 

How do I know when to change the teeth and pilot, what should I be looking out for?

The Auger Torque S4 auger that is supplied as standard with this package comes with the ShockLock Tungsten Teeth and Tungsten Pilot. These are very hard wearing and capable of continuous use in hard ground conditions. 

When the tungsten tips on the teeth and the pilot are worn off then it is time to change the wear parts on your auger. If in doubt – you are welcome to send us pictures of your auger and we can advise on the best action to take with regards to replacement wear parts. 

You should never let your teeth and pilot become worn to the extent that it is causing damage to the tooth holder or pilot drive lug, as this can result in an expensive auger repair or replacement.

For example – the cost for a new set of teeth and pilot for a 300mm S4 auger is approximately £230, drastically cheaper than a replacement auger.

Auger Torque X2500 mini digger auger package on a Kubota KX016

You offer a single pin hitch, why should I buy that one instead?

A single pin hitch offers a quick auger mounting solution that can be easily used with a variety of Auger Torque Earth Drills and excavators. 

In this instance – the X2500 Budget Package represents a good saving, cost wise, against our standard X2500 Package. These are usually stock items that we can dispatch on a Next Day delivery service. The Auger Torque single pin hitch is designed for direct mounting on excavators without a quick coupler, the single pin hitch is not designed for use with an excavator quick hitch. 

The drawback of the single pin hitch is that lack of control over the drilling string, there is no ability for the mini digger operator to control the direction of the auger when drilling or travelling around a job site. 

If you feel one option is better than the other, please tell me why.

Our preference is always the cradle hitch option, when possible. We understand that it comes with increased cost however, we feel that the level of extra control and manoeuvrability offered by a cradle mounting solution make this the preferential option in the majority of cases. 

What other attachments can I attach to my unit?

As distributors of the complete Auger Torque range of attachments, we have a variety of extra attachments available for your X2500 drive unit – the primary ones being our Stump Planer, Log Splitter and Mixer Bowl attachments.

X2500 Mini Digger Auger Package

Posted on

How to fit hydraulic hoses on your Auger Torque X1500

How to fit hydraulic hoses on an Auger Torque X1500 earth drill

How to Fit Hydraulic Hoses to Your X1500 Earth Drill

Auger Torque Earth Drills up to the 8000MAX model are supplied with a pair of hydraulic hoses (no quick release couplers). A quick guide below for fitting hydraulic hoses to your X1500 Earth Drill.

How to fit hydraulic hoses on an Auger Torque X1500 earth drill

Step 1

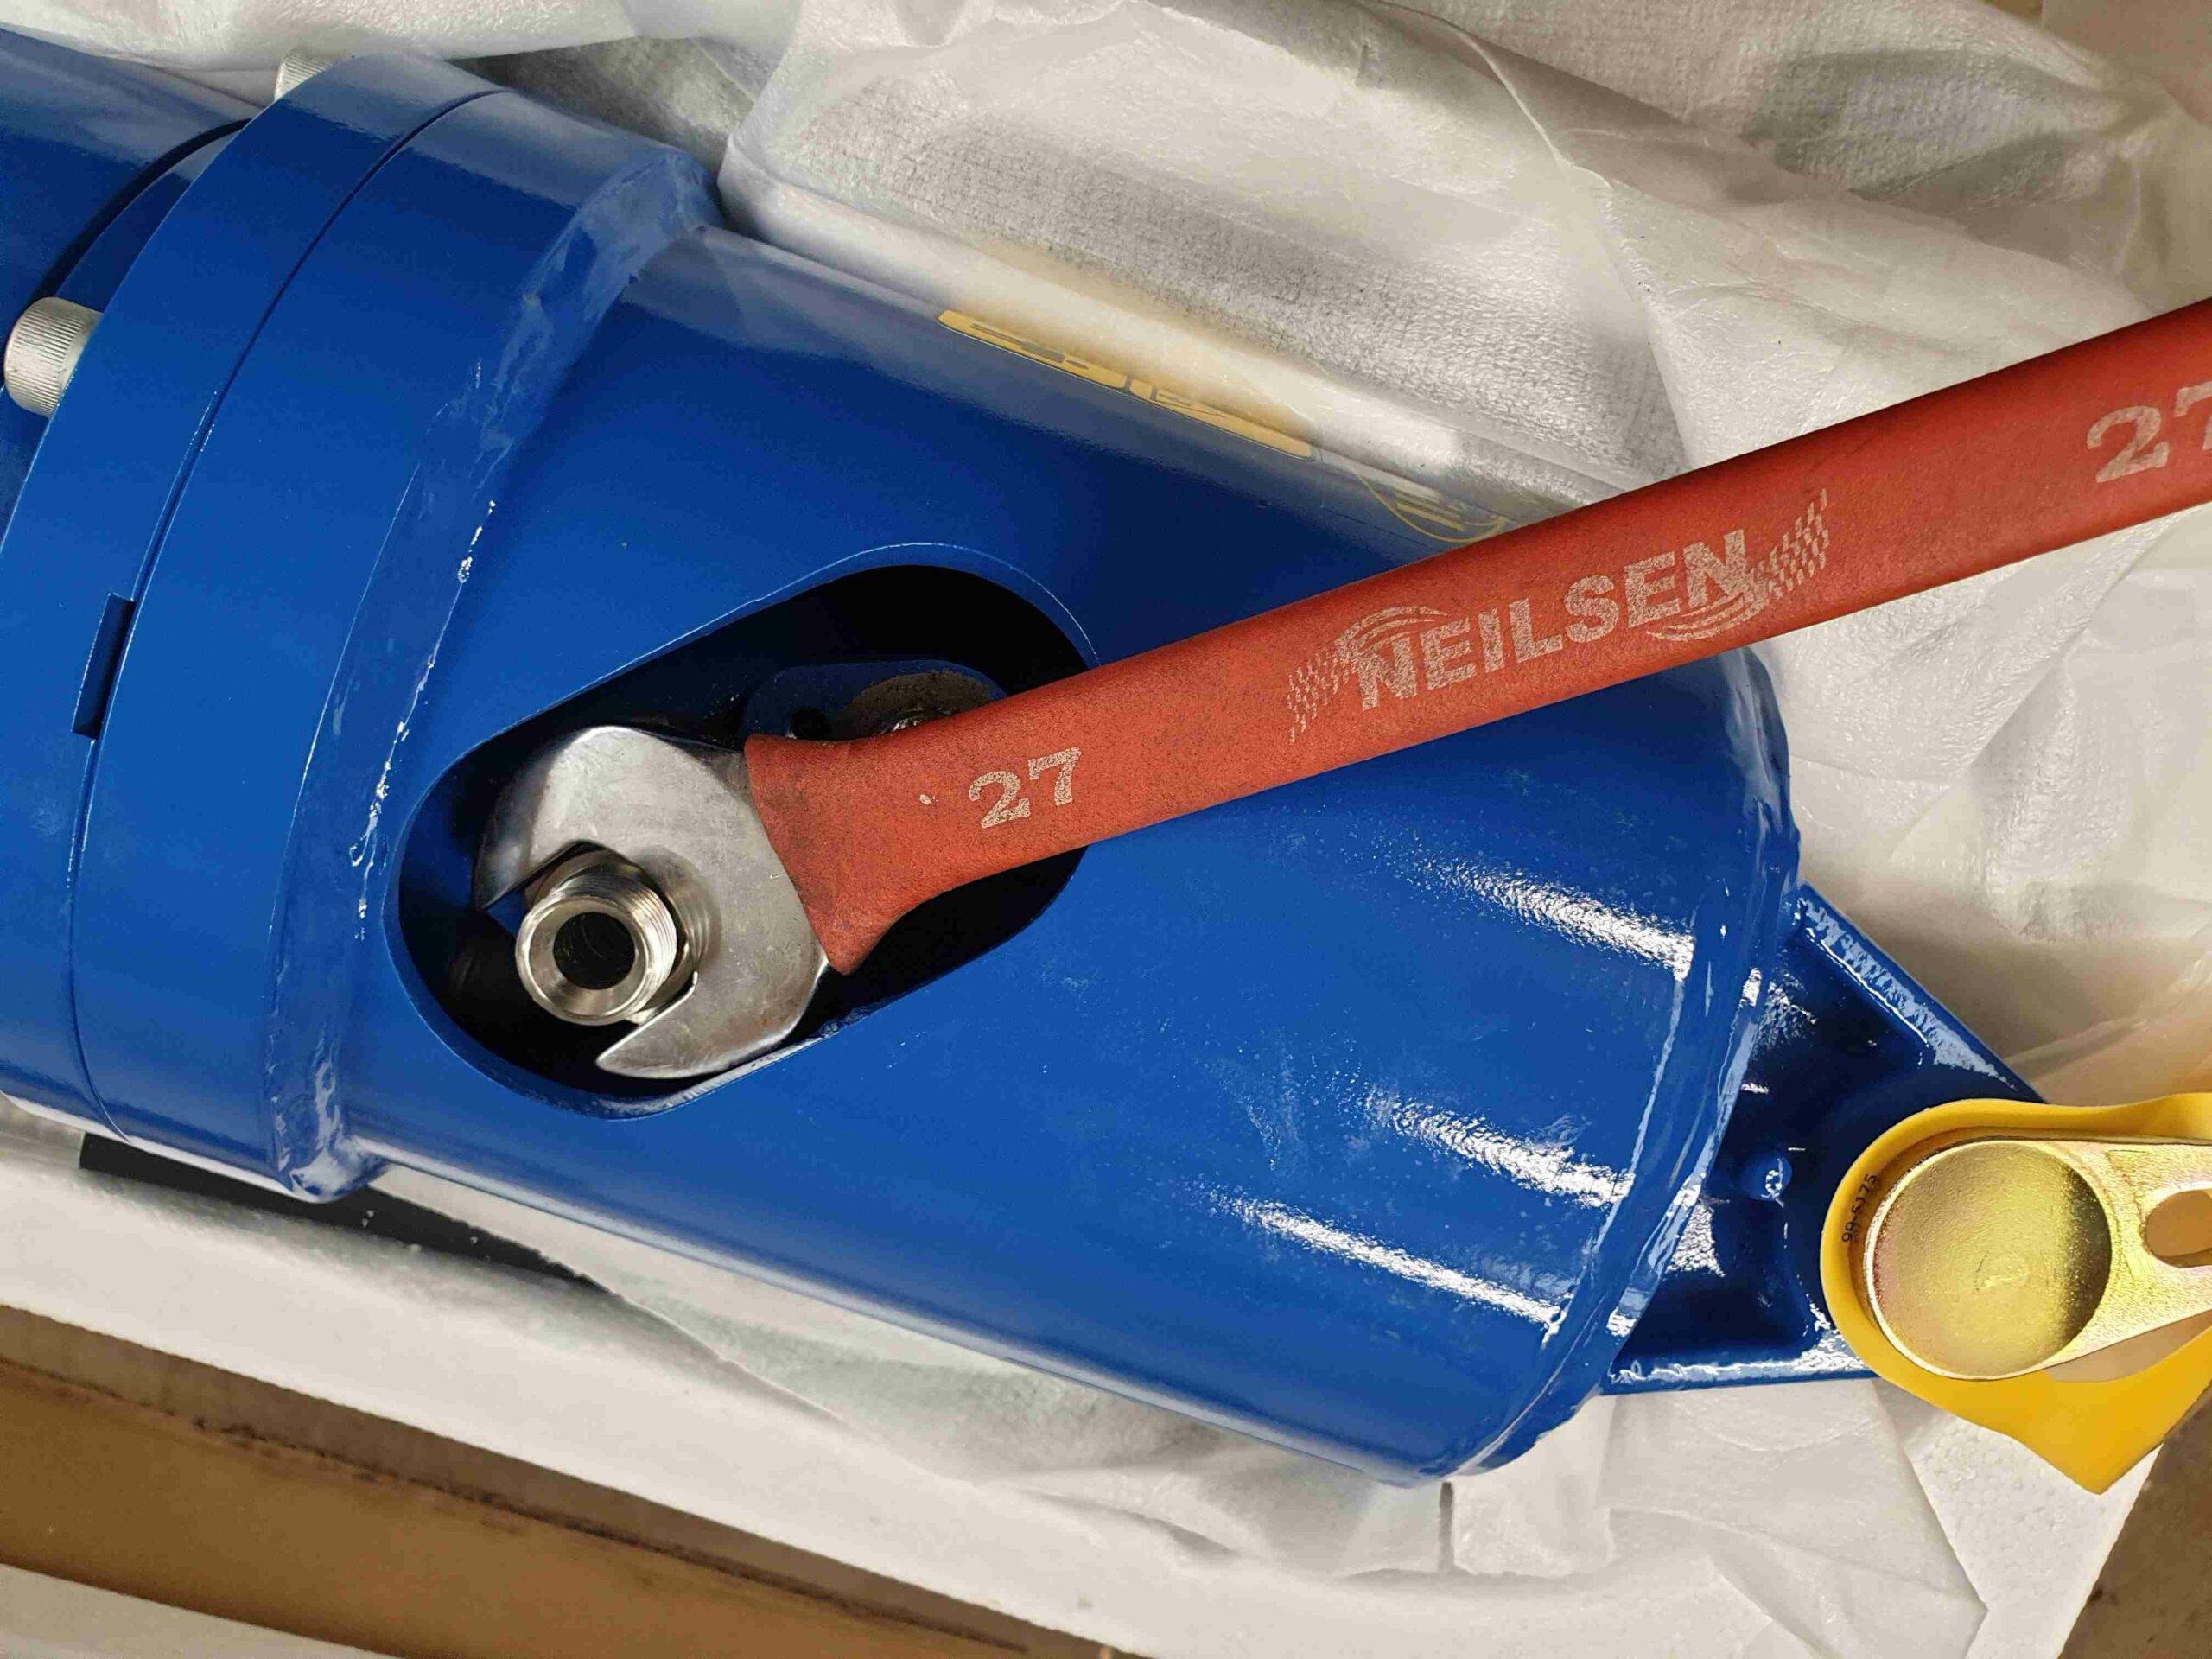
Remove the blanking caps from the hose ports on the drive unit. Be sure to remove the black washer(s) also.

How to fit hydraulic hoses on an Auger Torque X1500 earth drill

Step 2

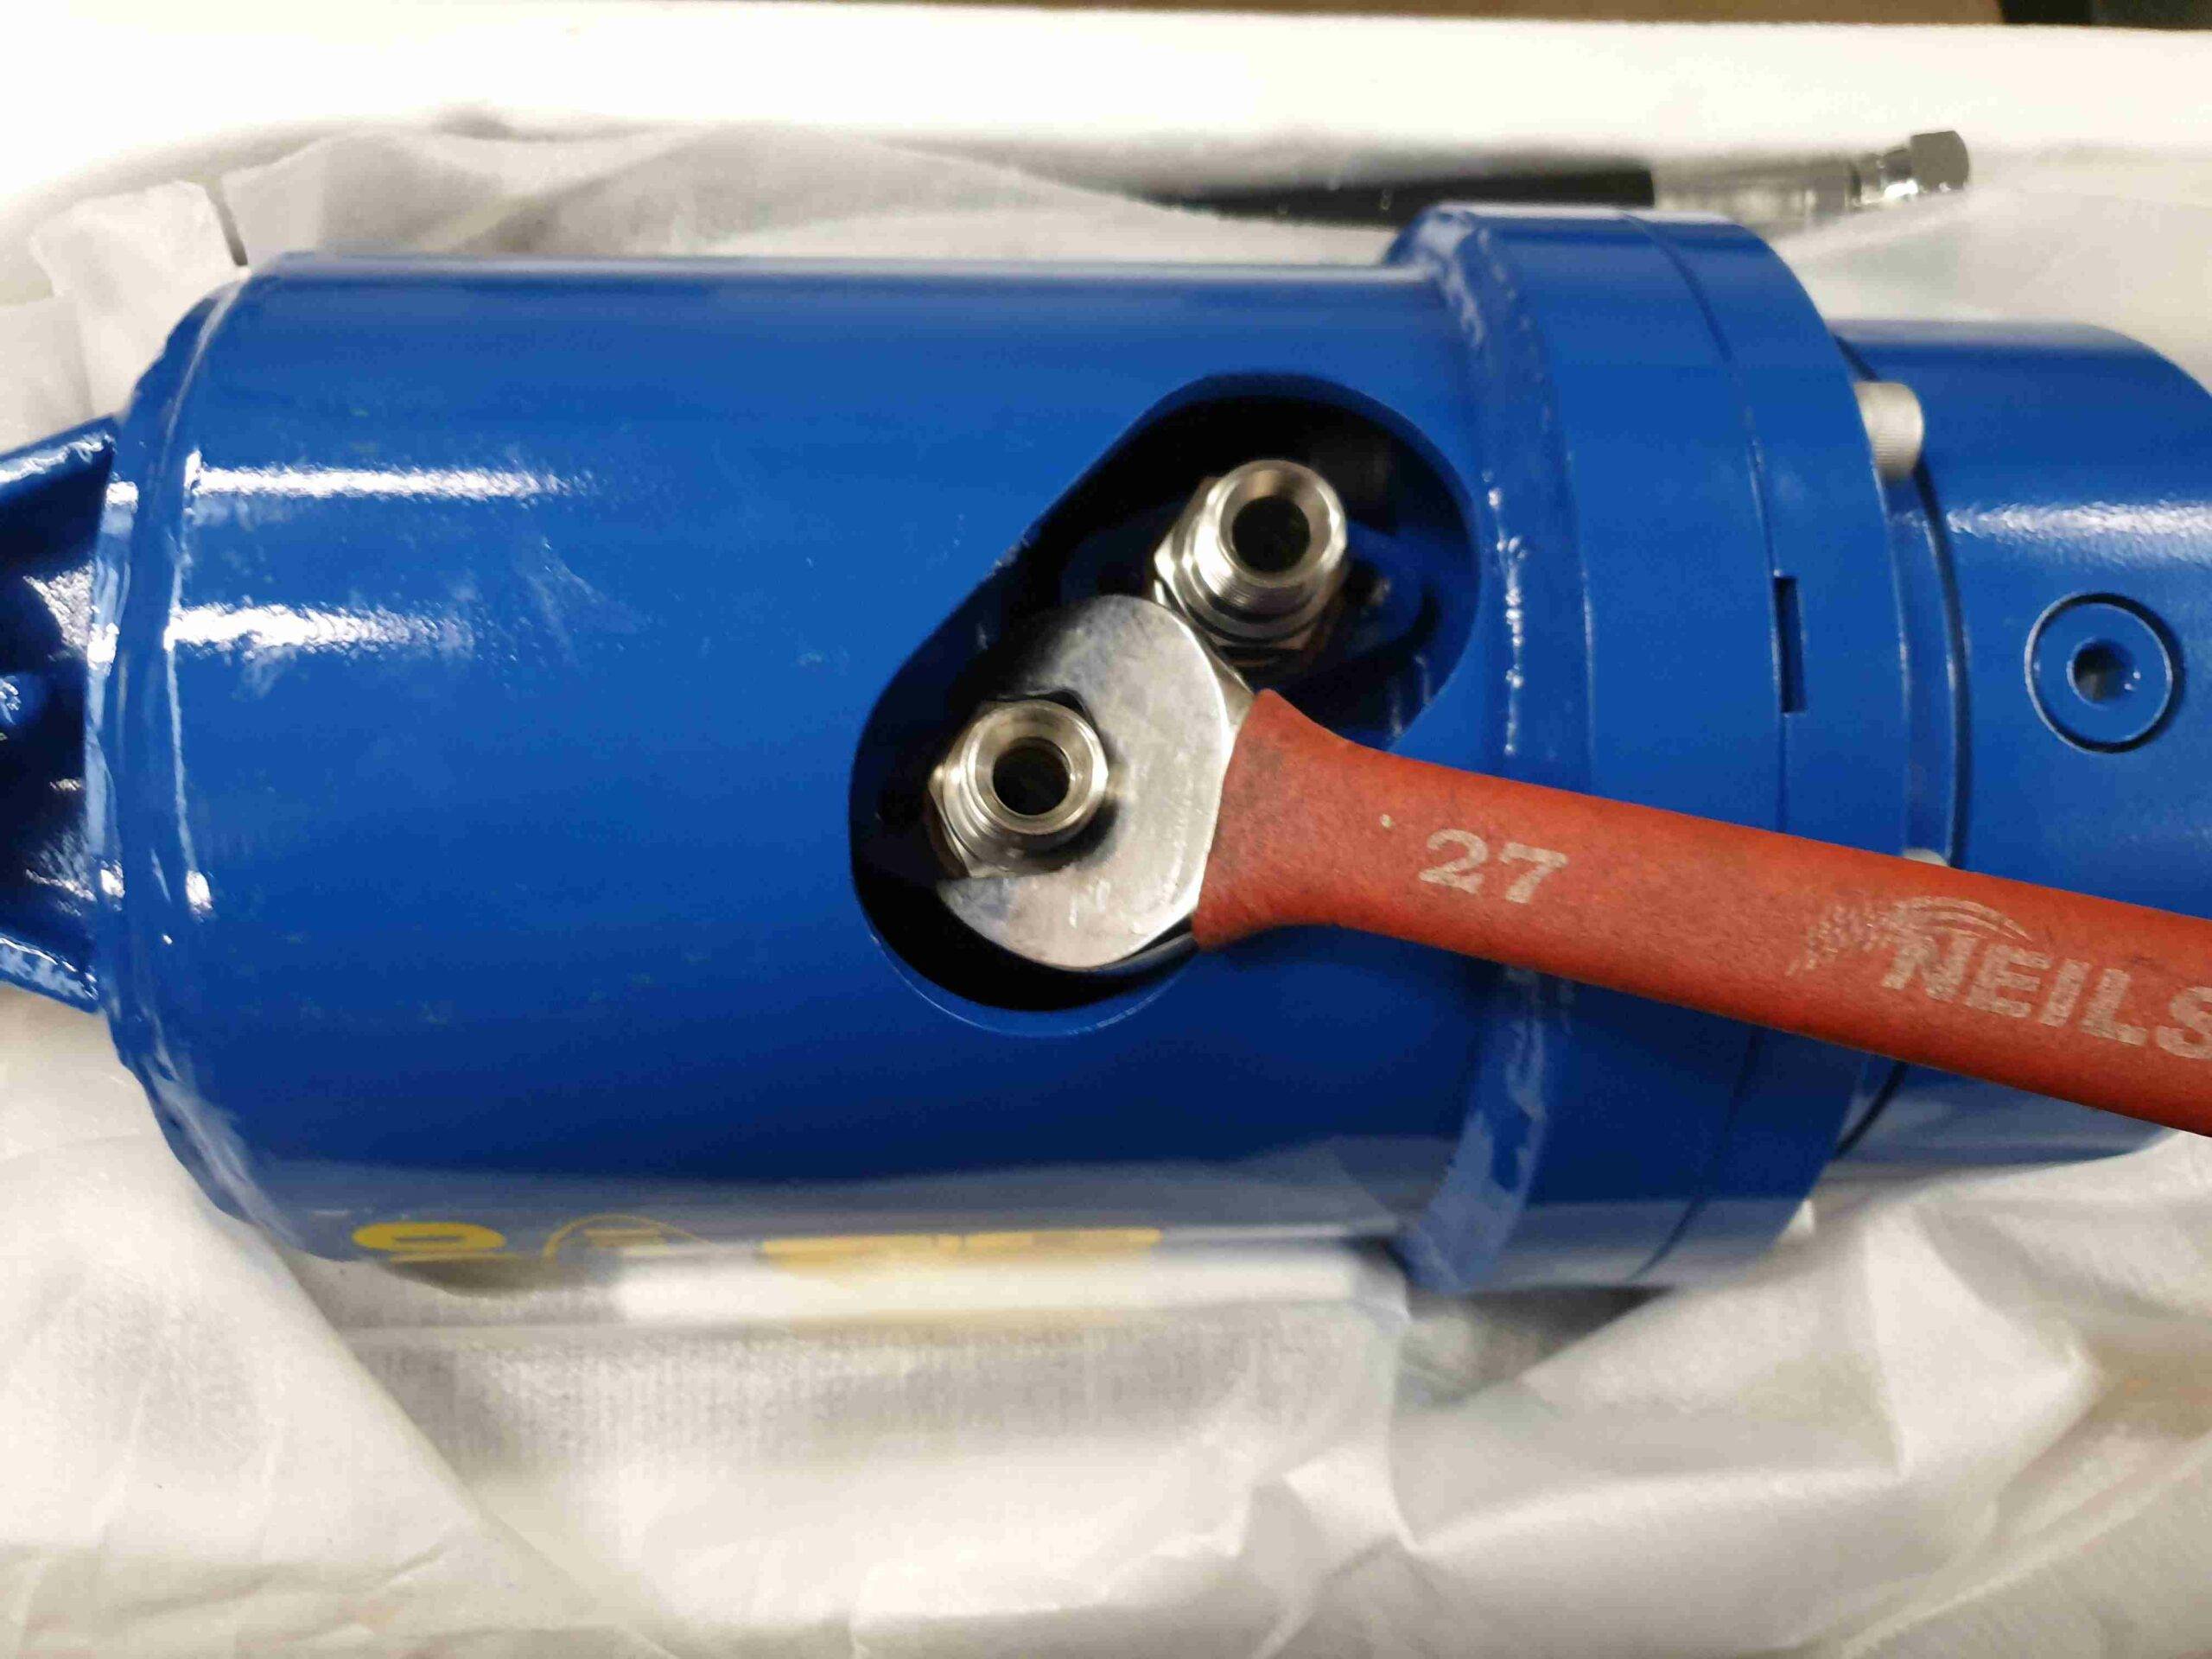
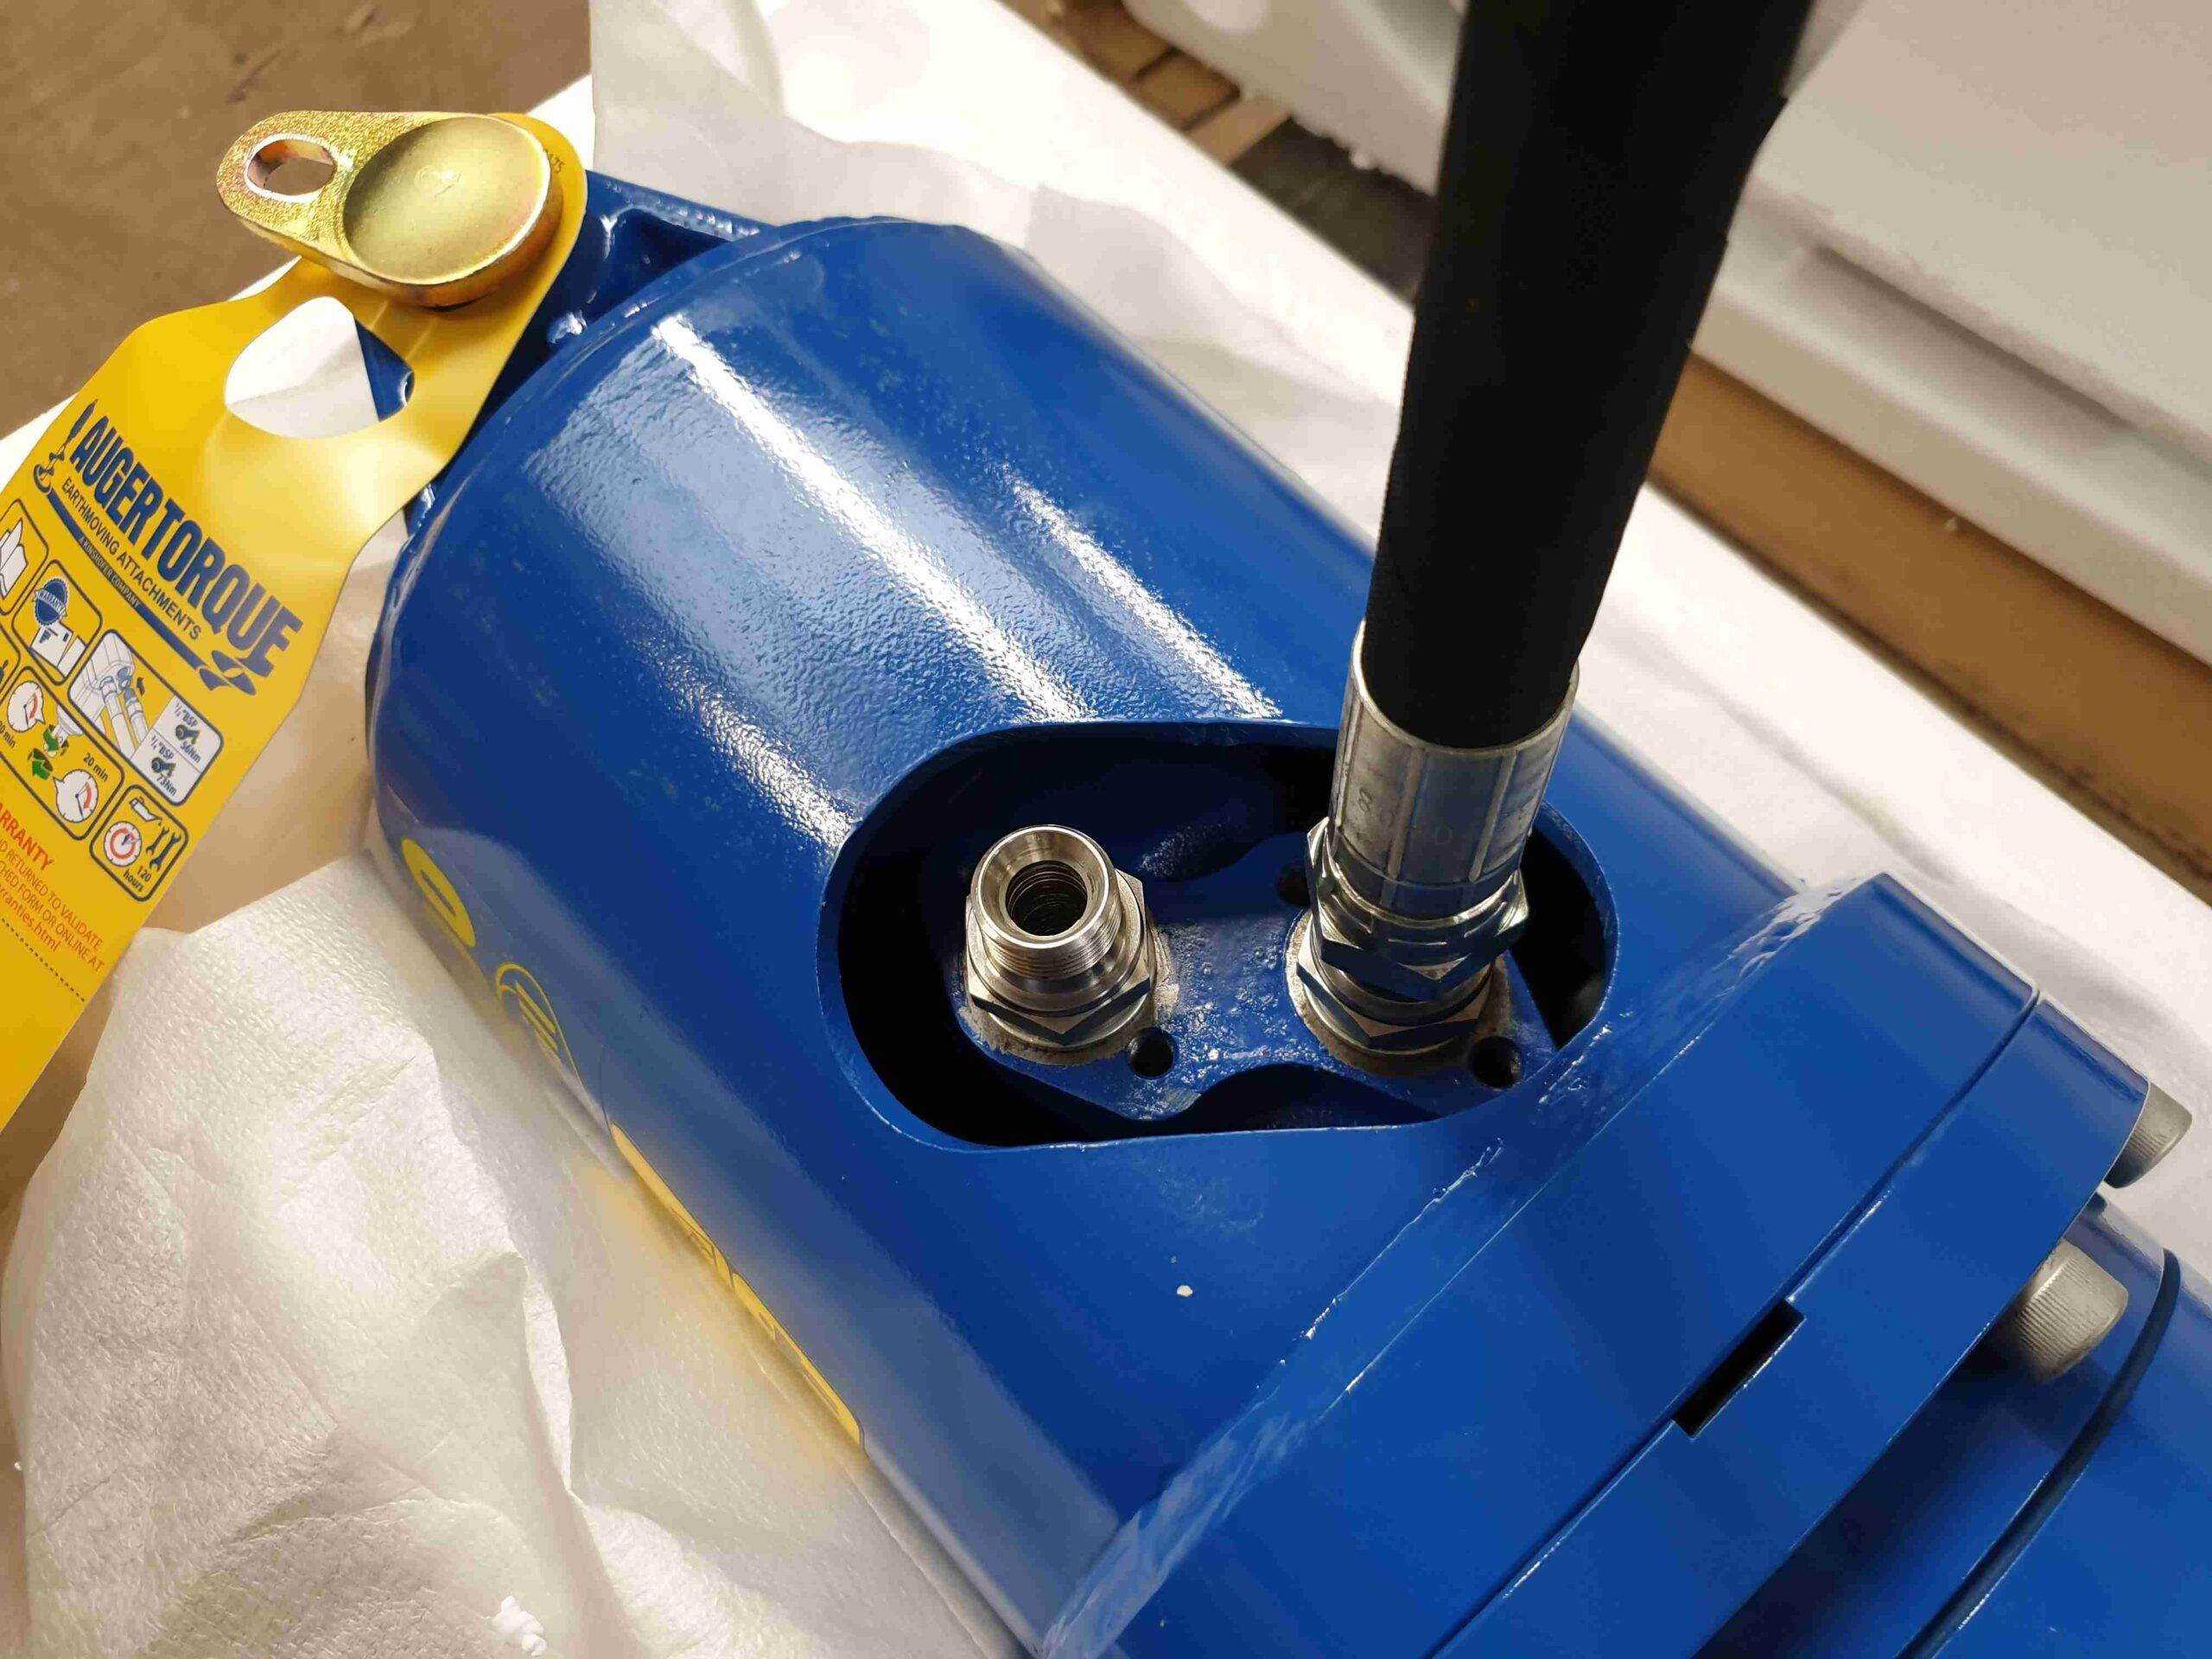
Ensure to fit the male-male adapter to the drive unit motor ports with the dowty washer seal towards the drive unit.

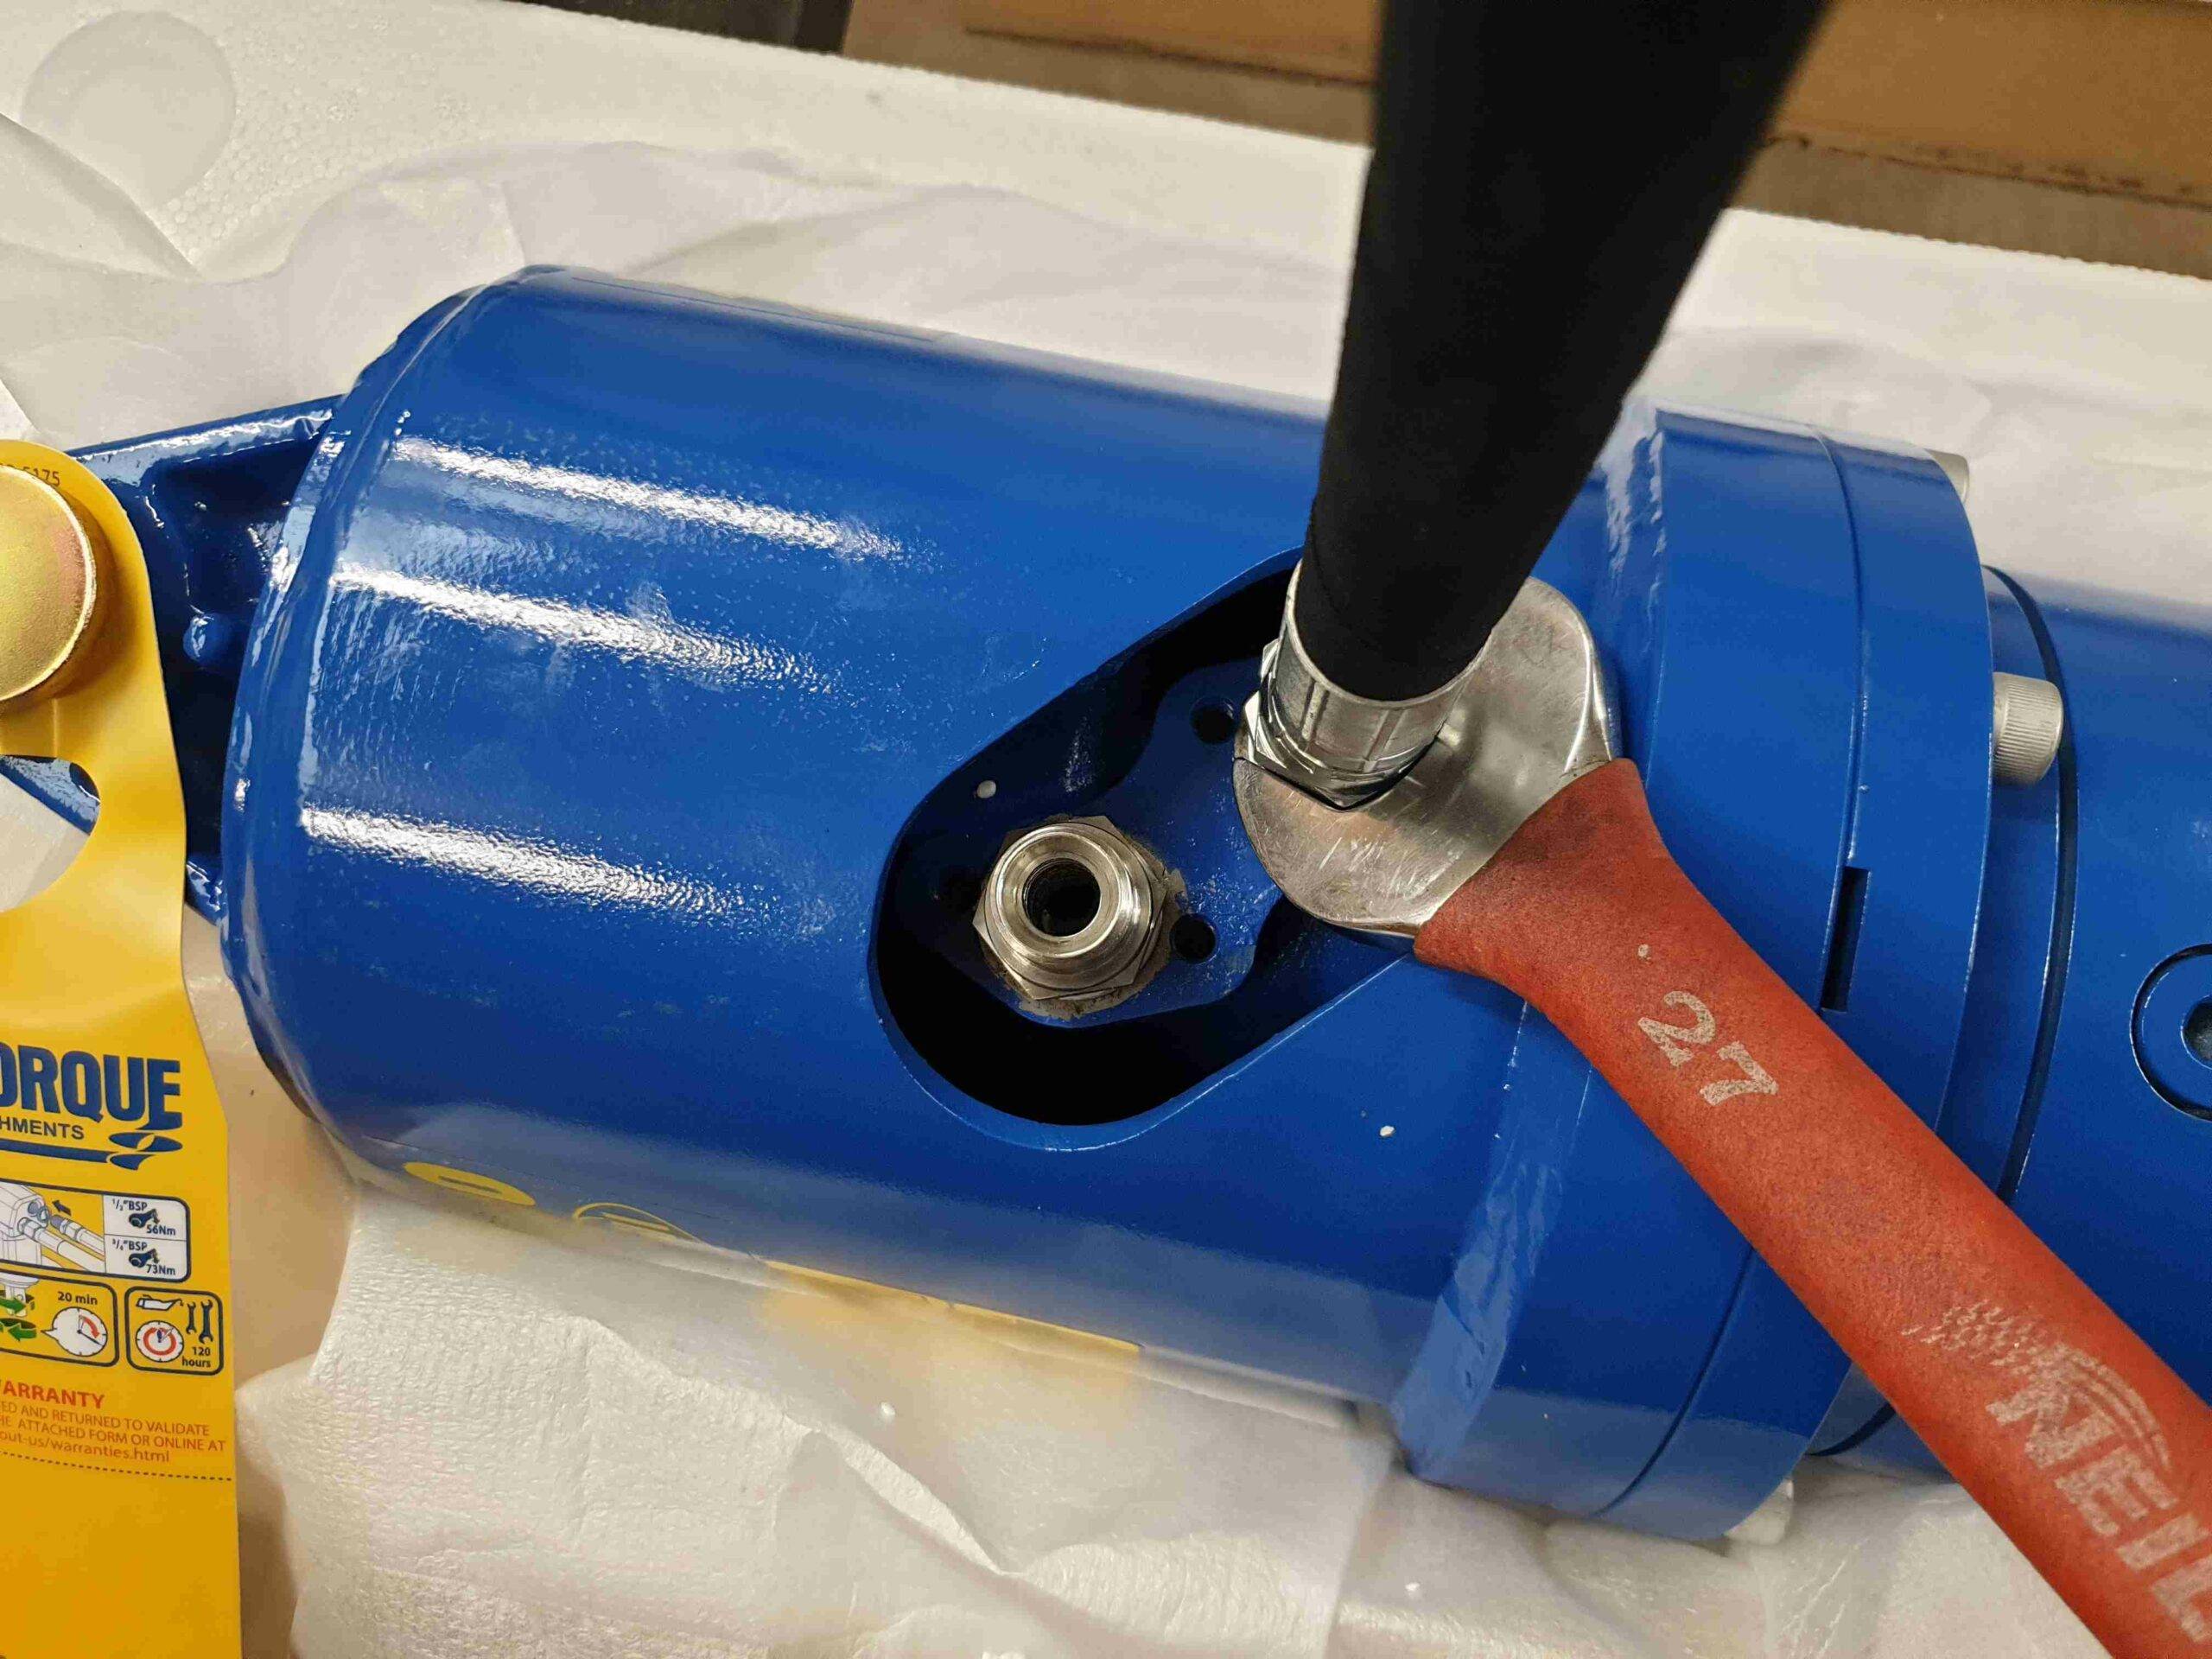
A 27mm spanner is required to ensure the adapter is tight. Tighten 1 adapter before starting to thread the other one onto the drive unit.

How to fit hydraulic hoses on an Auger Torque X1500 earth drill

A 27mm spanner is required to ensure the adpater is tight. Tighten 1 adapter before starting to thread the other one onto the drive unit.

Step 3

Fit the hydraulic hoses to the male-male adapters using the 27mm spanner to tighten. Install your flat face hydraulic couplers on the other end of the hydraulic hoses.

How to fit hydraulic hoses on an Auger Torque X1500 earth drill
  • Auger Torque X1500 Package (1-1.6t Excavators)

    £1,570.00£1,865.00
    Select options This product has multiple variants. The options may be chosen on the product page